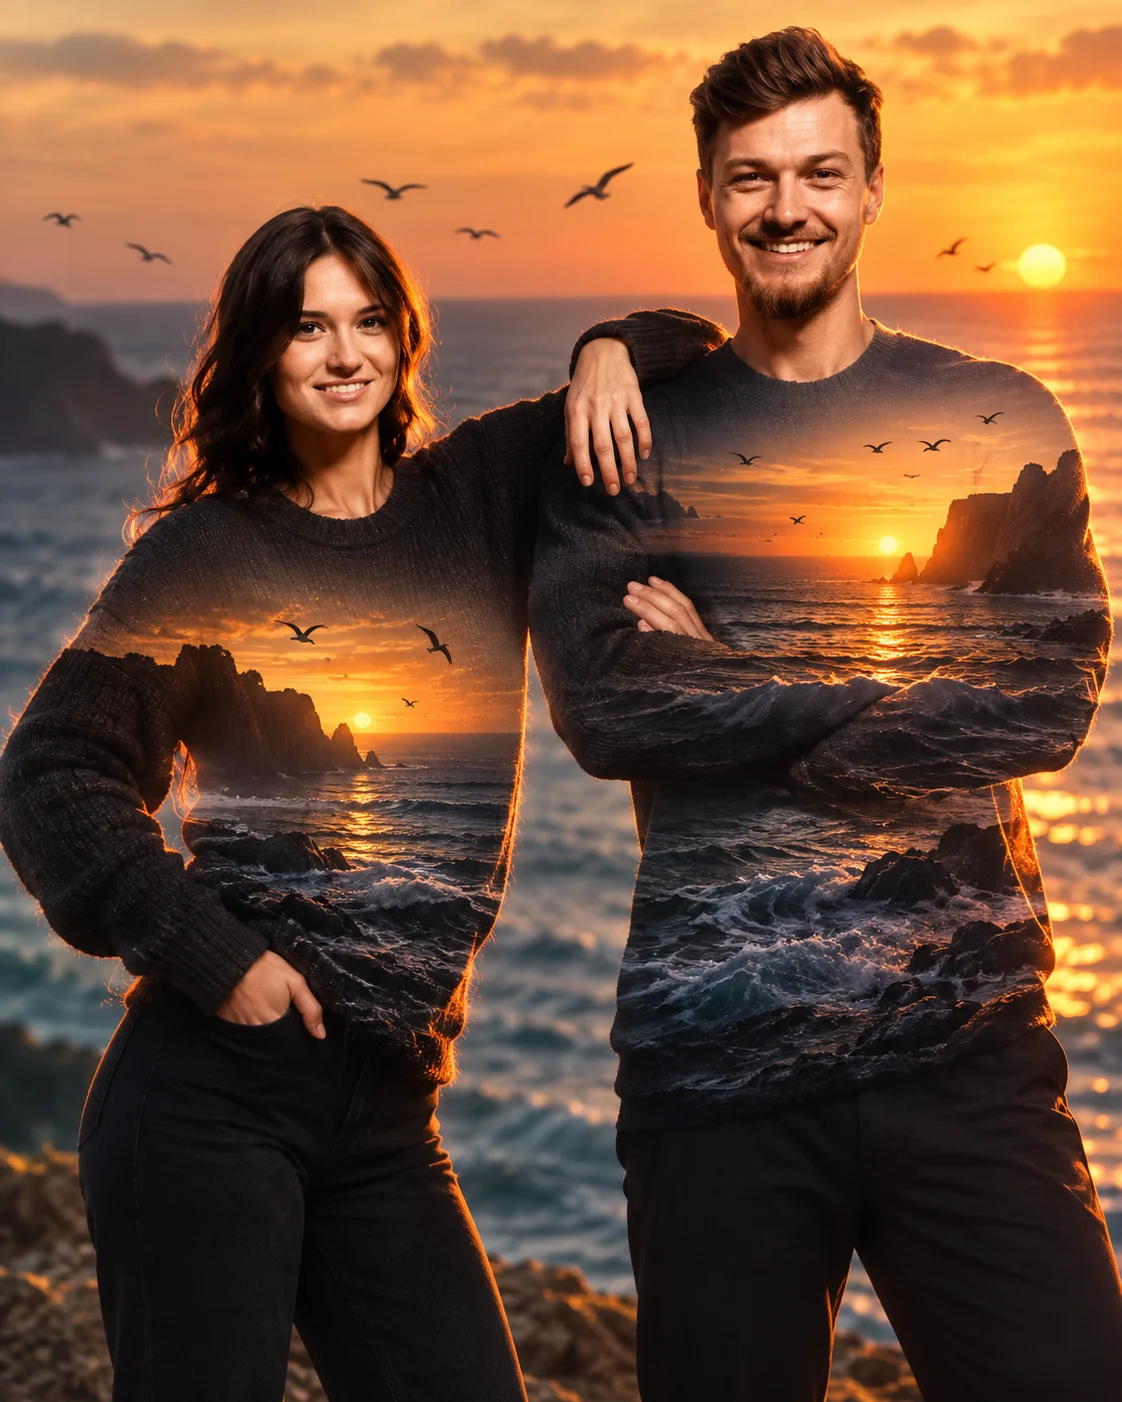
Ocean Sunset Double Exposure Portrait
Create a realistic ocean sunset double-exposure portrait that keeps your identity intact while blending waves, cliffs, birds, and warm light.
Using the uploaded photo, create a realistic fine-art double-exposure portrait where the person remains clearly recognizable as the same individual. KEEP - Keep the exact face structure, eye shape and natural eye colour, skin tone and visible skin texture, hairline, facial hair if present, and natural body proportions from the uploaded photo. Preserve the original jawline, cheek structure, nose shape, lips, forehead proportions, and distinctive facial details. Keep the person's apparent age and identity unchanged. Keep the face crisp enough that the uploaded person is immediately recognizable. CHANGE - Change the setting into an artistic ocean-sunset double exposure. Replace the original wardrobe with a simple dark matte garment made from soft cotton or wool, keeping its shape secondary to the silhouette. Replace the original background with a vast ocean at sunset. Use deep navy water, muted amber sunlight, warm orange reflections, and dark charcoal cliffs. Change the pose to a calm three-quarter portrait with the head slightly turned toward the horizon, while keeping natural body proportions. SCENE - Place the subject beside a wide ocean during late golden hour, just before sunset. Inside the person's silhouette, blend rolling ocean waves, distant rugged cliffs, small seabirds crossing the horizon, and sunlight reflected across the water. Keep the outer facial contours clean while allowing the internal ocean imagery to appear through the silhouette with controlled transparency. Use a softly blurred distant horizon and atmospheric depth rather than a sharply detailed background. LIGHT - Light the face from the front-left with soft, warm sunset illumination around 4000K, with gentle amber highlights along the cheek, forehead, and nose. Add subtle rim light from the setting sun so the face and ocean elements share the same direction of illumination. CAMERA - Use an 85mm portrait lens at f/2.0, camera positioned at chest height, with natural perspective compression and shallow depth of field. GRADE - Apply a cinematic film-style grade with warm amber highlights, deep navy shadows, moderate contrast, restrained saturation, and natural skin colour. OUTPUT - Create a vertical 4:5 composition at 4K resolution, with the face positioned slightly above centre and enough negative space around the silhouette. DO-NOT - Do not slim the face, whiten the skin, change the eye colour, plastic-smooth the skin, invent jewellery or tattoos, alter facial proportions, or replace recognizable identity details.
Photo Guide
- Use a sharp portrait photo with at least 2000px on its longest side.
- A front or three-quarter angle gives the ocean silhouette a cleaner shape.
- Use even natural light so the sunset lighting can blend into the face.
- Keep the full hairline, jawline and shoulders visible in the source photo.
- A plain background works best because it will not compete with the ocean blend.
- Avoid sunglasses or heavy shadows across the face; they can break identity.
How to Build
- 1Gemini: upload the portrait and paste the prompt into image generation.
- 2Choose 4:5 portrait output and the highest available resolution.
- 3Keep the uploaded image as the identity reference, not as a style reference.
- 4Generate once, then inspect the jawline, eyes, hairline and silhouette edges.
- 5If the first result is wrong, regenerate while naming the drifting feature precisely.
Pro Tips
- Use a three-quarter portrait so the ocean has room to form inside the silhouette.
- Choose warm source lighting so sunset highlights do not look pasted onto skin.
- Keep shoulders visible so the double-exposure outline stays anatomically clean.
- Avoid busy clothing because fabric patterns can interfere with the ocean imagery.
- Use a darker top so the internal waves remain visible without weakening the silhouette.
Share This Prompt
About the Author
Naziya
Creative AI writer at MFDA, sharing trendy photo-editing prompts and fresh ideas for beautiful, stylish AI images.