Anime Flashlight AI Photo Prompt 2026
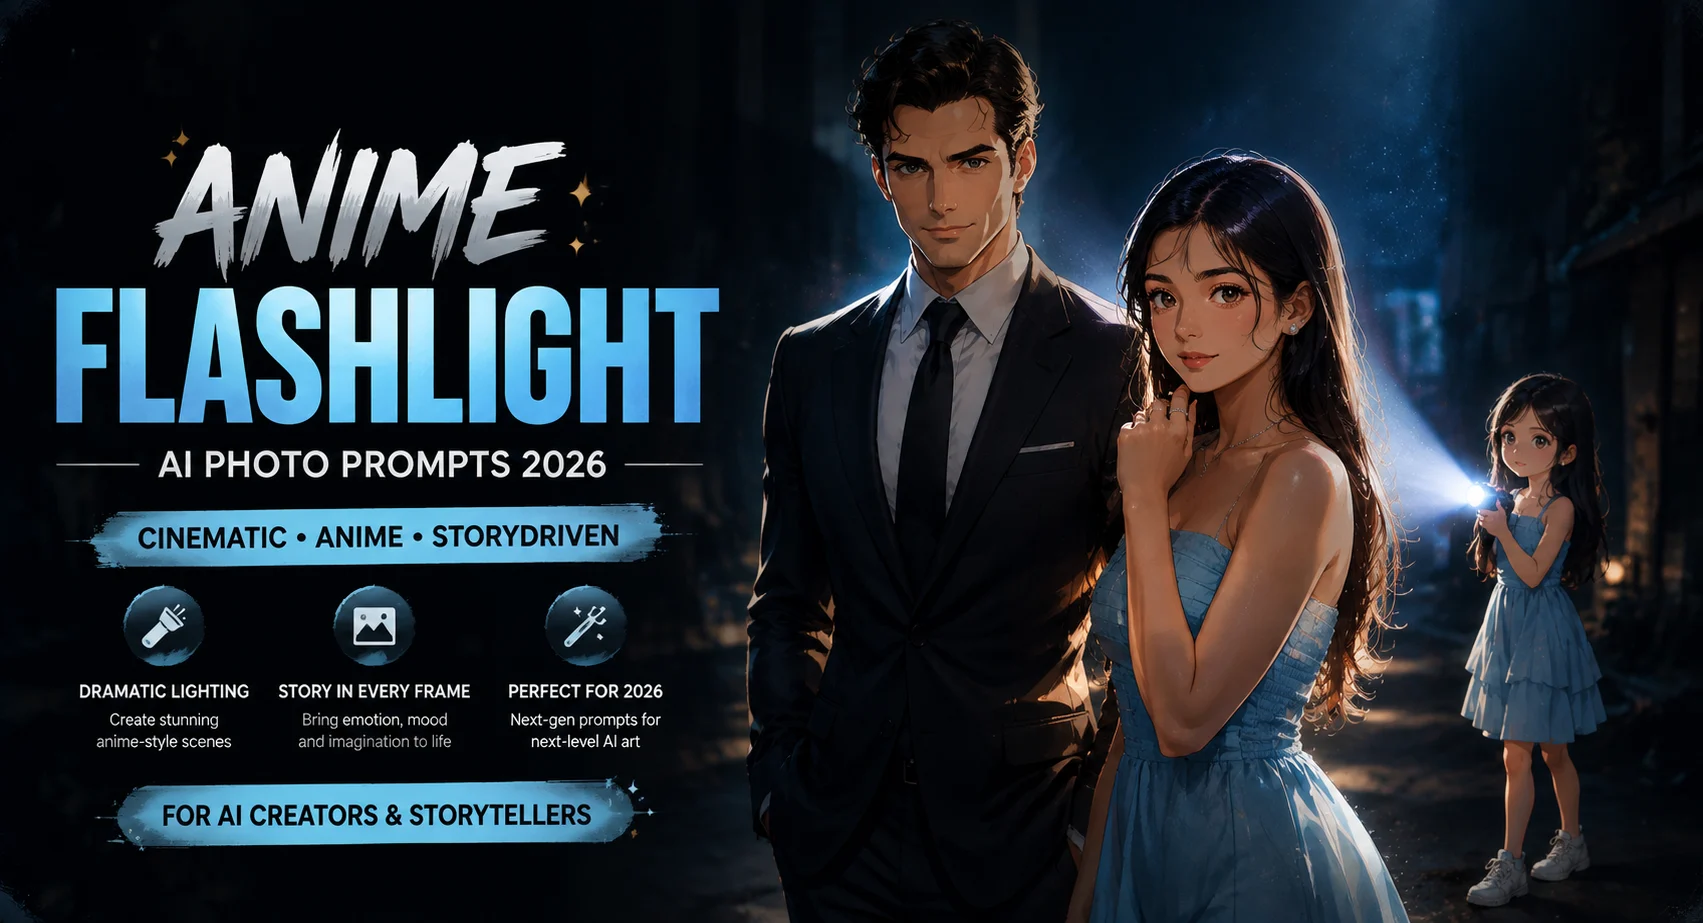
A normal outdoor photo can become much more interesting when a small anime version of you appears behind the subject with a working flashlight. The key is making the added character belong to the original scene rather than looking like a pasted cartoon. These Anime Flashlight AI Photo Editing Prompt styles focus on that integration: matching the person's visible outfit and hair, keeping the original composition, and making the flashlight affect the real subject with believable light. During testing, the flashlight beam is the part that needs the most attention. If the beam looks like a flat white streak, the entire edit loses its photographic feel. The strongest results use rim light, shadows, glow, and contact with the surrounding environment.
Before you start
Choose a photo where your full outfit and hairstyle are easy to see because those details give the anime version useful visual references. A person standing outdoors works particularly well when there is enough space behind them for the miniature character. You also want visible background detail so the lighting change has something to interact with.
Photo: Clear outdoor portrait with the subject's hair, clothing, and accessories visible
Tool: ChatGPT or another AI image editor that accepts an uploaded reference photo
Aspect ratio: Keep the original photo ratio unless you specifically need a social-media crop
Miniature Anime Character With a Strong Backlight
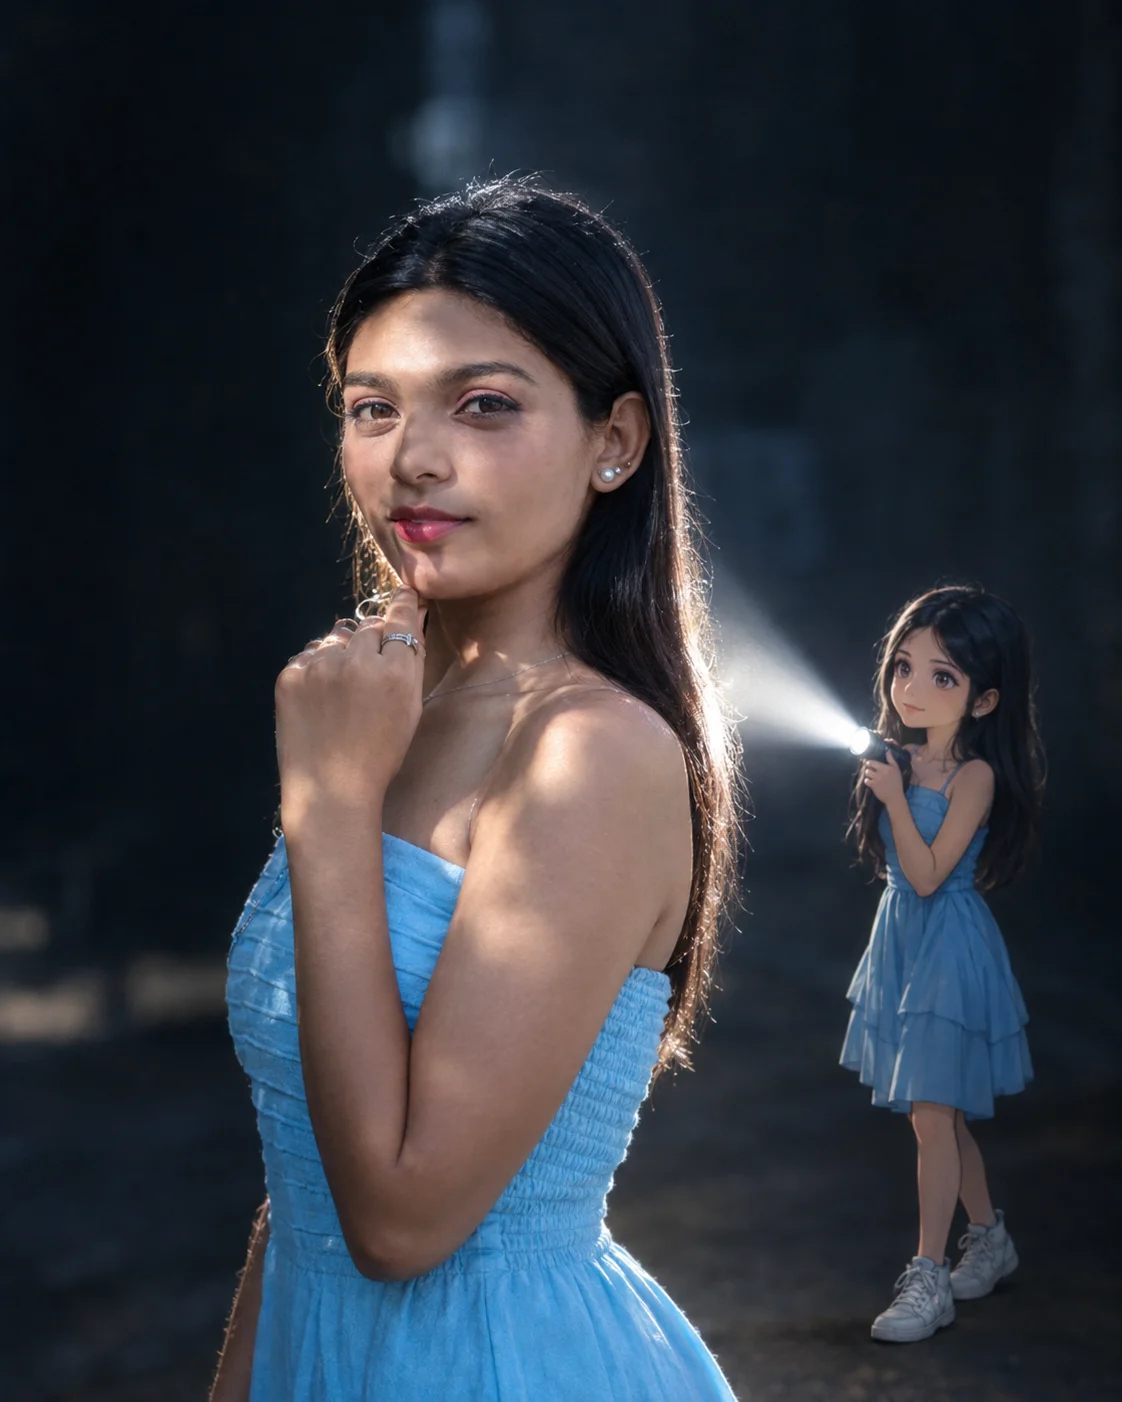
This version creates a compact full-body anime character directly behind the real subject. The character follows the visible hairstyle, outfit, colors, and accessories while holding a flashlight toward the person's back. The important visual detail is the interaction between the white beam and the real subject: bright edges, softer surrounding glow, and shadows help connect both styles.
The Prompt
Using the uploaded photo, create a photorealistic vertical 4:5 portrait of the same person with a compact full-body anime character standing directly behind them. KEEP — Preserve the exact facial identity and visible structure from the uploaded photo, including forehead shape, eyebrow placement, eye shape and natural eye colour, nose bridge and tip, lips, cheeks, cheekbones, jawline, chin, ears, facial width, and natural asymmetry. Keep the original skin tone, visible pores, fine facial texture, under-eye detail, hairline, hair density, hairstyle, and facial-hair pattern if present. Keep the person's natural body proportions, shoulder width, neck, arms, hands, height impression, and recognizable posture. Do not replace the person with a generic model. CHANGE — Add a compact full-body anime character directly behind the real person, scaled to roughly one-third of the person's height. Match the anime character's visible hairstyle, outfit colours, clothing shapes, and accessories to the real subject without inventing distinctive items that are not visually supported. Give the character a small handheld flashlight aimed toward the real person's upper back. Keep the anime figure crisp enough to read clearly while preserving the real person's photographic realism. SCENE — Place both figures in a simple dim environment with enough open space behind the subject for the miniature character to remain visible. The flashlight creates a bright white beam crossing behind the real person's shoulders, with a soft glow spreading into the surrounding darkness. LIGHT — Use the flashlight as a strong rear three-quarter light source, producing a narrow white beam, bright rim highlights along the subject's hair and shoulders, and softer reflected illumination around the edges. Keep the face lit naturally from the front and slightly above so it does not look pasted into the scene. Use a neutral-to-cool 5000K light balance. CAMERA — Shoot at 85mm, f/2.8, camera at chest height, with moderate compression and shallow depth of field. Keep the real person's face sharply focused while allowing the distant background to fall softly out of focus. GRADE — Use a cinematic contrast curve, cool shadows, restrained highlights, natural skin colour, and subtle film grain. Keep the white flashlight beam clean without clipping facial details. OUTPUT — Vertical 4:5 composition at 2048 × 2560 resolution, with the complete miniature character visible behind the subject. DO NOT — no face slimming, no skin whitening, no changed eye colour, no plastic smoothing, no invented jewellery or tattoos, no altered facial proportions, no generic replacement face, no oversized anime character, and no flashlight beam covering the face.
✦ Curated by MFDA
Real-and-Anime Scene With Cinematic Light
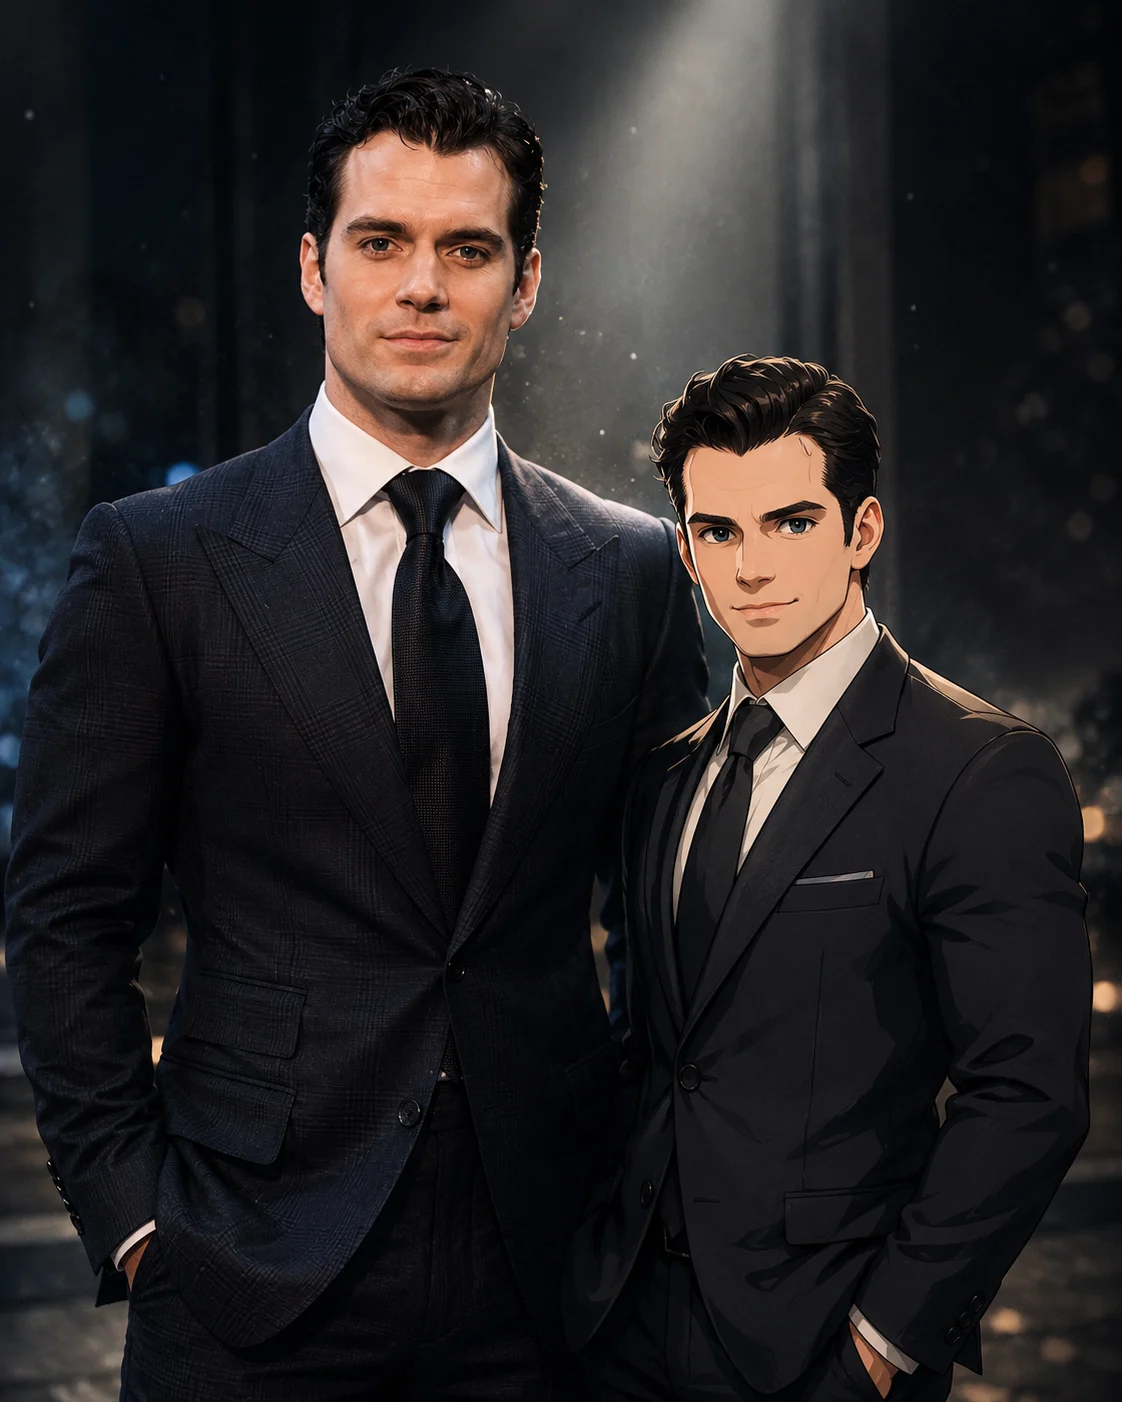
The second approach pushes the scene integration further. The anime character remains recognizable as a stylized version of the photographed person, but the flashlight becomes part of the environment. Contact shadows, atmospheric glow, light particles, and a slightly darker surrounding area help the character feel physically present rather than layered over the photograph.
The Prompt
Using the uploaded photo, create a photorealistic vertical 4:5 portrait of the same person standing naturally beside a compact anime version of themselves, integrated into one believable cinematic environment. KEEP — Preserve the exact facial identity and visible structure of the photographed person: forehead shape, eyebrow placement, eye shape and natural eye colour, nose bridge and tip, lips, cheeks, cheekbones, jawline, chin, ears, facial width, and natural asymmetry. Keep the original skin tone, pores, fine texture, natural marks, under-eye detail, hairline, hair density, hairstyle, and facial-hair pattern if present. Keep the original body proportions, shoulder width, neck, arms, hands, height impression, and natural expression. Do not replace the photographed person with a generic model. CHANGE — Add a compact anime character representing the same person, with clearly stylized anime proportions while retaining recognizable facial cues, hairstyle, and overall identity. Dress the anime character in [anime outfit colour and style], using [fabric/material] with visible folds and texture. Place both figures in [cinematic environment], with a darker surrounding area and subtle atmospheric particles. Make the anime character physically occupy the same space rather than appearing as a flat overlay. SCENE — Set the scene during [time of day], with the real person and anime character positioned close enough for believable contact shadows. Keep the background softly blurred, with visible environmental depth, faint haze, and small floating light particles around the shared space. LIGHT — Use a focused flashlight-like beam from [light direction], with soft falloff across both figures. Match the face illumination to the environment using a neutral-to-cool 4500K light, subtle rim glow, and grounded contact shadows beneath the anime character. CAMERA — Capture at 85mm f/1.8 from chest height, with natural perspective compression and shallow depth of field. Keep both subjects sharp enough to show facial detail while the background gradually falls out of focus. GRADE — Use cinematic contrast, restrained saturation, cool shadows, warm highlights, realistic skin colour, and subtle film grain. Keep the anime character slightly more luminous without making it glow unnaturally. OUTPUT — Vertical 4:5 composition, 2048×2560 resolution, photorealistic detail and clean facial texture. DO-NOT — No face slimming, no skin whitening, no changed eye colour, no plastic smoothing, no invented jewellery or tattoos, no generic face replacement, no floating anime character, no missing contact shadows, and no mismatched lighting between the two figures.
✦ Curated by MFDA
How to use these in ChatGPT
Open ChatGPT's image generation or editing feature and start with the photo you want to modify.
Upload one clear reference image where your clothing, hairstyle, pose, and surrounding scene are visible.
Choose one prompt card and use it with the uploaded image rather than combining both versions.
Keep the original composition at first. Don't ask for a new location, different pose, and new character design in the same generation.
Inspect the flashlight and anime character separately. Check whether the character matches your visible features and whether the beam creates believable illumination on the real subject.
Regenerate with a focused correction if something fails. For example, ask for the anime character to move farther behind you or for the flashlight to create visible rim light instead of changing the entire scene.
Getting better results
Use a photo with space behind the subject because the miniature character needs a believable place to stand.
Keep your clothing clearly visible because matching the outfit gives the anime version a stronger connection to the real person.
Use a strong directional beam because a vague glow doesn't explain where the light is coming from.
Ask for contact shadows because the added character can otherwise appear to float above the ground.
Preserve the original camera angle because a mismatched perspective makes the anime figure look pasted into the photograph.
Darken the surroundings slightly rather than making everything black because the flashlight should stand out while the original location remains recognizable.
Change one problem at a time because replacing the character, background, lighting, and pose together makes it difficult to identify what caused the failed result.
When the result comes out wrong
What went wrong | Why it happens | What to change |
|---|---|---|
Anime character looks unrelated to you | The reference doesn't provide enough visible identity anchors | Keep the hairstyle, outfit, colors, glasses, and other visible details explicit |
Character looks like a sticker | The lighting and shadows don't interact with the photograph | Add contact shadows, environmental glow, and light falling onto nearby surfaces |
Flashlight looks like a white line | The model treats the beam as a graphic element | Ask for volumetric light, realistic falloff, rim illumination, and shadows |
Background changes completely | The editor prioritizes the new scene instructions | Explicitly preserve the original location, camera angle, framing, and background |
Anime figure is too large | The model interprets “anime version” as another full-size subject | Specify a small full-body character and give it clear placement behind the main subject |
Real subject loses facial identity | Too many visual transformations compete with the source photo | Tell the tool to preserve the original face, proportions, clothing, and pose while adding only the anime character |
FAQ
Can I use my own photo for this edit?
Yes. A personal photo is the most useful starting point because the effect depends on matching the anime character to visible features from the reference. Use a sharp image where your hairstyle, clothes, accessories, and body position are easy to identify. Very dark or heavily cropped photos give the editor less information to work with.
Will the anime character keep my face exactly?
Not necessarily. The goal is to create a recognizable stylized counterpart, but AI image editors can reinterpret facial details when converting a real person into anime. If identity is important, explicitly preserve the person's facial structure and visible characteristics, and keep the anime transformation limited to the added character.
Can I change the flashlight color?
Yes, if your image editor follows color and lighting instructions reliably. White light gives the clearest version of this effect, while colors such as blue or purple can create a more stylized scene. Colored light may also alter the apparent skin and clothing colors, so check the real subject after generation.
Can I use this effect commercially?
Check the current terms of the image tool you use, especially if you're creating advertising, client work, products, or paid social content. You should also have permission to use the original photograph and any third-party visual elements. The prompt itself doesn't give you ownership or commercial rights over every part of the finished image.
Is ChatGPT free for this?
Image features and usage limits can depend on the current ChatGPT plan and account. Availability can also change over time. If you're testing several variations, check the image-generation options and limits shown in your account rather than assuming every feature or generation quantity is available on a free plan.
Why does the flashlight make the whole photo look fake?
The beam has to affect the scene consistently. If the light is bright but the subject, ground, and nearby objects show no corresponding illumination, the effect looks added afterward. Ask for realistic falloff, rim light, contact shadows, and subtle environmental glow instead of simply increasing brightness.
Can I keep my original background?
Yes, and that is usually the better starting point for this particular effect. Tell the editor to preserve the original location, perspective, framing, and major background elements. If the first result replaces the environment, make background preservation the correction rather than adding more character details.
Closing
This effect works when the anime character and flashlight become part of the photograph's lighting rather than sitting on top of it. Start with a clear outdoor image, keep the original composition, and focus your corrections on character scale, beam direction, shadows, and identity. A few controlled generations are usually more useful than changing every detail at once.
Tags
About the Author
Naziya
Creative AI writer at MFDA, sharing trendy photo-editing prompts and fresh ideas for beautiful, stylish AI images.