7 Late Night Railway Station AI Video Prompts
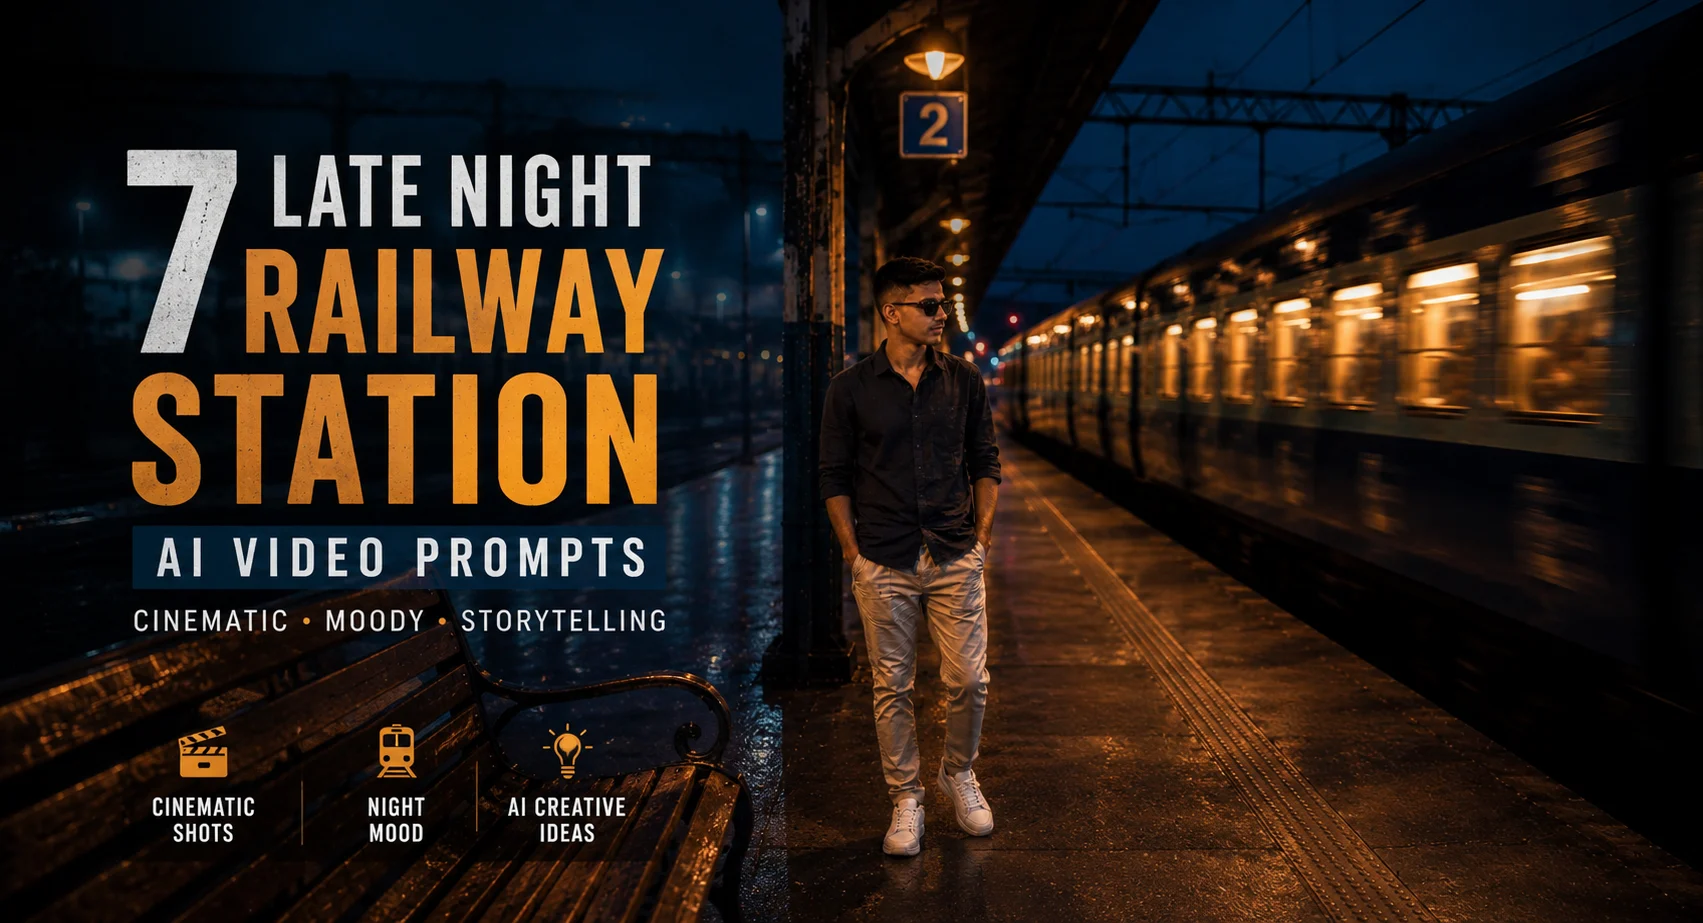
A quiet railway platform can make a simple portrait feel like a scene from a film. That’s the idea behind the late night railway station AI video prompt trend: you start with one personal photo and turn it into a short sequence of night-time shots with changing camera positions. When testing this style, the biggest difference comes from keeping the person's identity and clothing stable while changing the camera movement. A clean reference photo also matters more than having an extremely high-resolution original. The guide below focuses on creating that lonely, reflective railway-station mood without making the result look like a collection of unrelated AI clips.
Before you start
Use a photo where your face is clearly visible and your body isn't heavily cropped. A natural standing photo usually gives the model more useful information than a close selfie. For a night railway scene, simple dark clothing also tends to fit the lighting better.
Starting photo: Clear, front-facing or three-quarter photo with visible face and body
Tool: Google Gemini with its image/video generation features
Format: 9:16 vertical
Style: Realistic night cinematography with warm station lights
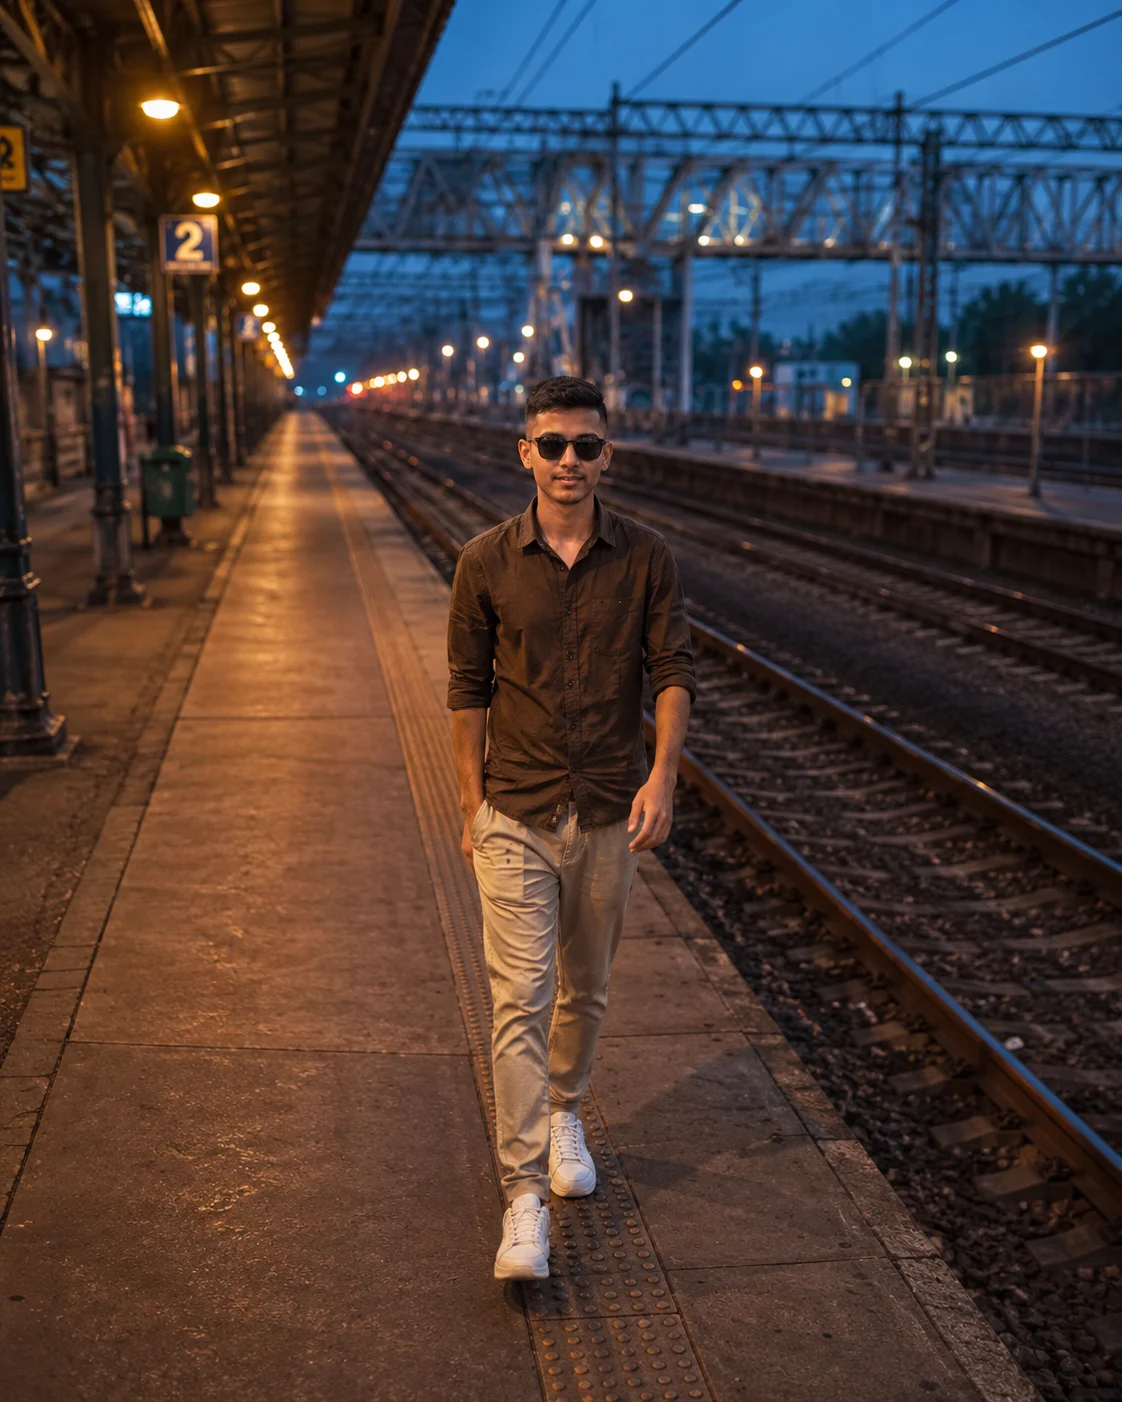
Foot-Over-Bridge Walk
This version opens with movement instead of immediately showing a close-up. The elevated camera position gives you railway tracks, platform lights and the person's silhouette in the same frame. Warm amber lighting works particularly well here because it separates the subject from the darker surroundings while keeping the scene believable.
The Prompt
@Create image Using the uploaded photo, create a realistic cinematic railway-platform portrait captured while the person is walking along the platform, with the camera positioned slightly above them so the railway tracks, platform lights and full silhouette remain visible in the frame. KEEP - Keep the exact face structure from the uploaded photo, including jawline, cheek shape, nose, lips and chin. Keep the original eye shape and natural eye colour. Keep the original skin tone and visible skin texture, including pores, freckles, marks and fine lines. Keep the original hairline, hair texture and facial hair if present. Keep the person's natural age and full body proportions, including shoulder width, torso length, waist, arms and legs. Do not make the person taller, slimmer or broader. CHANGE - Dress the person in a [wardrobe choice] made from realistic [fabric], using [main colour] with subtle natural folds. Change the setting to a railway platform at evening, with dark steel tracks and warm amber platform lamps. Use a natural walking pose with one foot slightly ahead and relaxed arms, as if captured mid-step. Add gentle directional lighting from the platform side and a softer fill from the opposite side. Give the image a warm cinematic colour grade without changing the person's actual skin colour. SCENE - Place the person beside two visible railway tracks on a clean station platform during blue hour, shortly after sunset. Show repeating platform lights and distant railway structures behind them. Keep the tracks and lights recognizable but softly blurred toward the distance, while the person remains sharply defined. LIGHT - Light the face mainly from the front-left at a warm 3200K, with soft overhead ambient blue-hour light and a weaker neutral fill from the right. Keep shadows naturally connected to the face and clothing. CAMERA - Use an 50mm lens at f/2.8, camera about chest-to-head height but positioned slightly above the subject's eye line. Keep moderate background compression while retaining enough environment to show the tracks. GRADE - Apply a restrained cinematic grade with warm amber highlights, cool blue shadows, medium contrast and natural skin tones. Avoid heavy teal-orange processing or excessive glow. OUTPUT - Create a realistic 4:5 vertical image at 2048 × 2560 resolution, with the person fully visible from head to feet and enough space around the walking silhouette. DO-NOT - No face slimming, no skin whitening, no changed eye colour, no plastic smoothing, no invented jewellery or tattoos, and no altered body proportions.
✦ Curated by MFDA
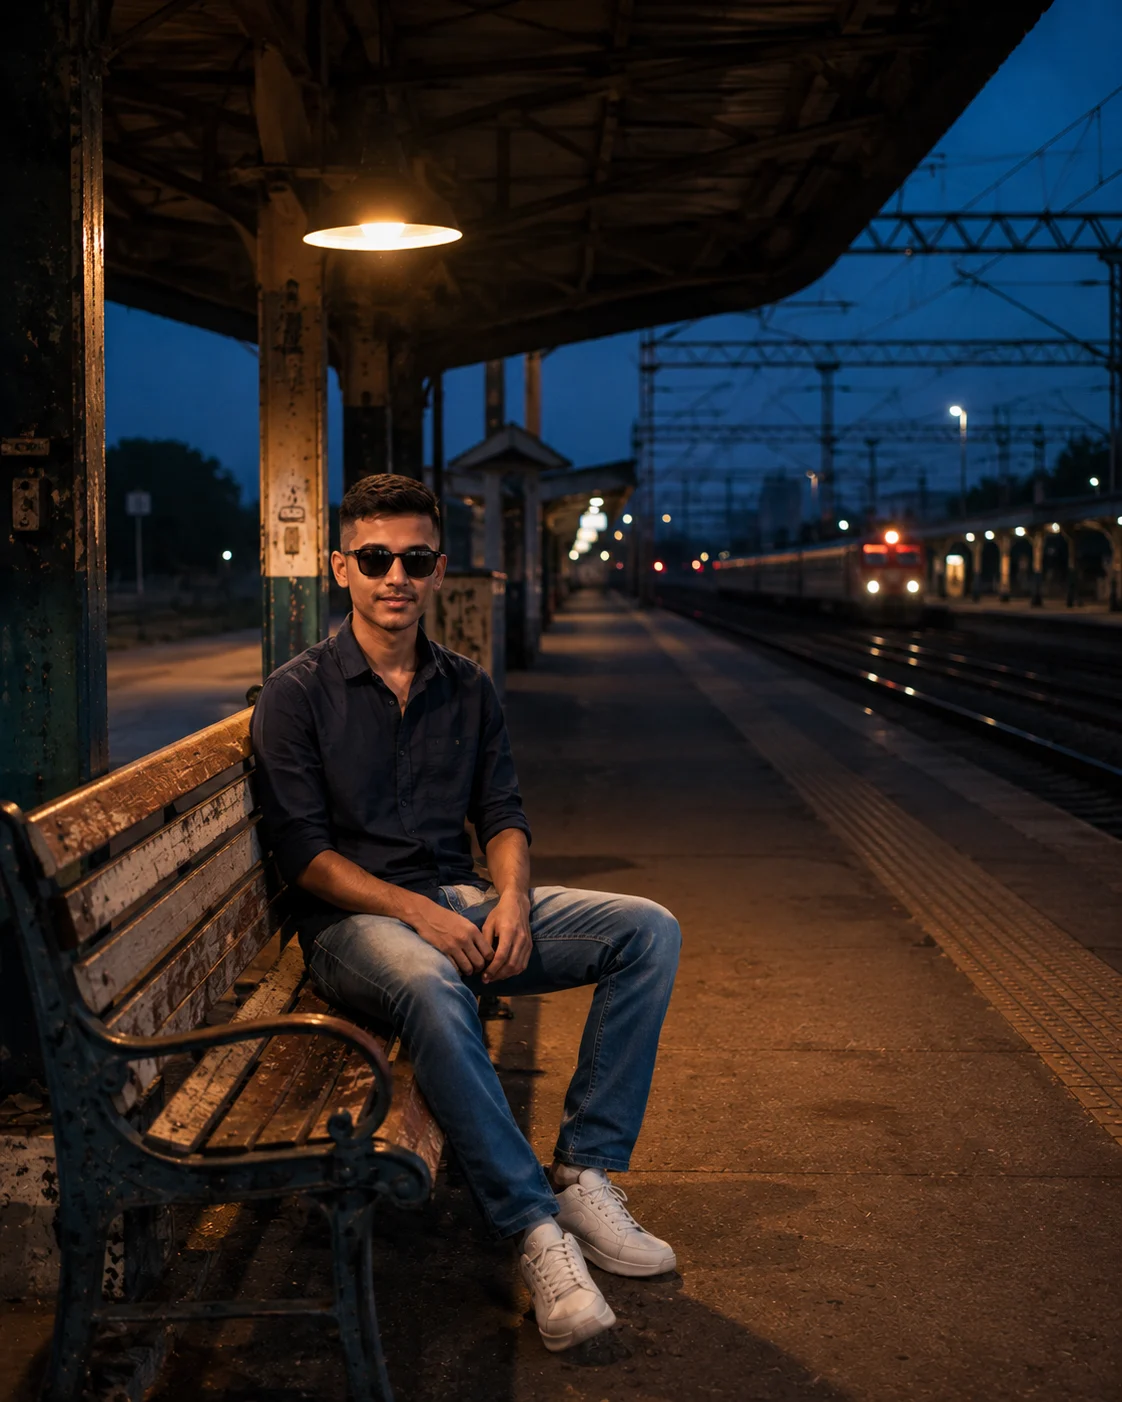
Quiet Platform Bench Scene
The bench shot is designed around stillness. The person sits beneath a single station light while a distant train creates a small point of activity behind them. The seated posture is important because it gives the video a visual pause after the walking sequence. Keep the expression relaxed rather than forcing an exaggerated sad face.
The Prompt
Using the uploaded photo, create a realistic cinematic railway station portrait of the same person sitting quietly on a station bench beneath a single overhead platform light, with a distant train forming a small point of activity behind them. KEEP - Keep the exact face structure from the uploaded photo, including jawline, cheek shape, nose, lips, chin and natural facial proportions. Keep the original eye shape and natural eye colour exactly. Keep the original skin tone and visible skin texture, including pores, freckles, marks and fine lines. Keep the original hairline, hair texture and facial hair if present. Keep the person's natural age and complete body proportions, including shoulder width, torso length, arms, hands, hips and legs. Preserve their recognizable identity rather than creating a lookalike. CHANGE - Dress the person in [wardrobe choice] made from [fabric], using [main colour] with realistic folds and stitching. Change the setting to an older railway platform with a weathered metal-and-wood bench. Place the person in a relaxed seated posture, shoulders naturally lowered, hands resting loosely near the lap, with a calm expression rather than an exaggerated sad face. Add one warm station light above and slightly in front of the person. Keep the background darker and less active than the subject. SCENE - Set the scene during blue hour shortly after sunset. Place the person beneath one visible station lamp, with railway tracks, platform structures and a distant train behind them. Make the distant train small in the frame and softly blurred, with only a few readable lights suggesting movement without distracting from the seated subject. LIGHT - Use soft directional light from above-front at approximately 3200K, creating gentle illumination across both eyes and the front of the face. Add faint cool ambient skylight from behind so the hair and shoulders separate naturally from the darker platform. CAMERA - Use a 50mm lens at f/2.8, camera positioned at seated eye height and about 1.5 metres away. Keep the bench and part of the platform visible while maintaining moderate background compression. GRADE - Use a restrained cinematic grade with warm amber highlights, cool blue shadows, medium contrast and natural skin tones. Keep the image clean rather than heavily stylized. OUTPUT - Create a realistic 4:5 vertical image at 2048 × 2560 resolution. DO-NOT - No face slimming, no skin whitening, no changed eye colour, no plastic smoothing, no invented jewellery or tattoos.
✦ Curated by MFDA
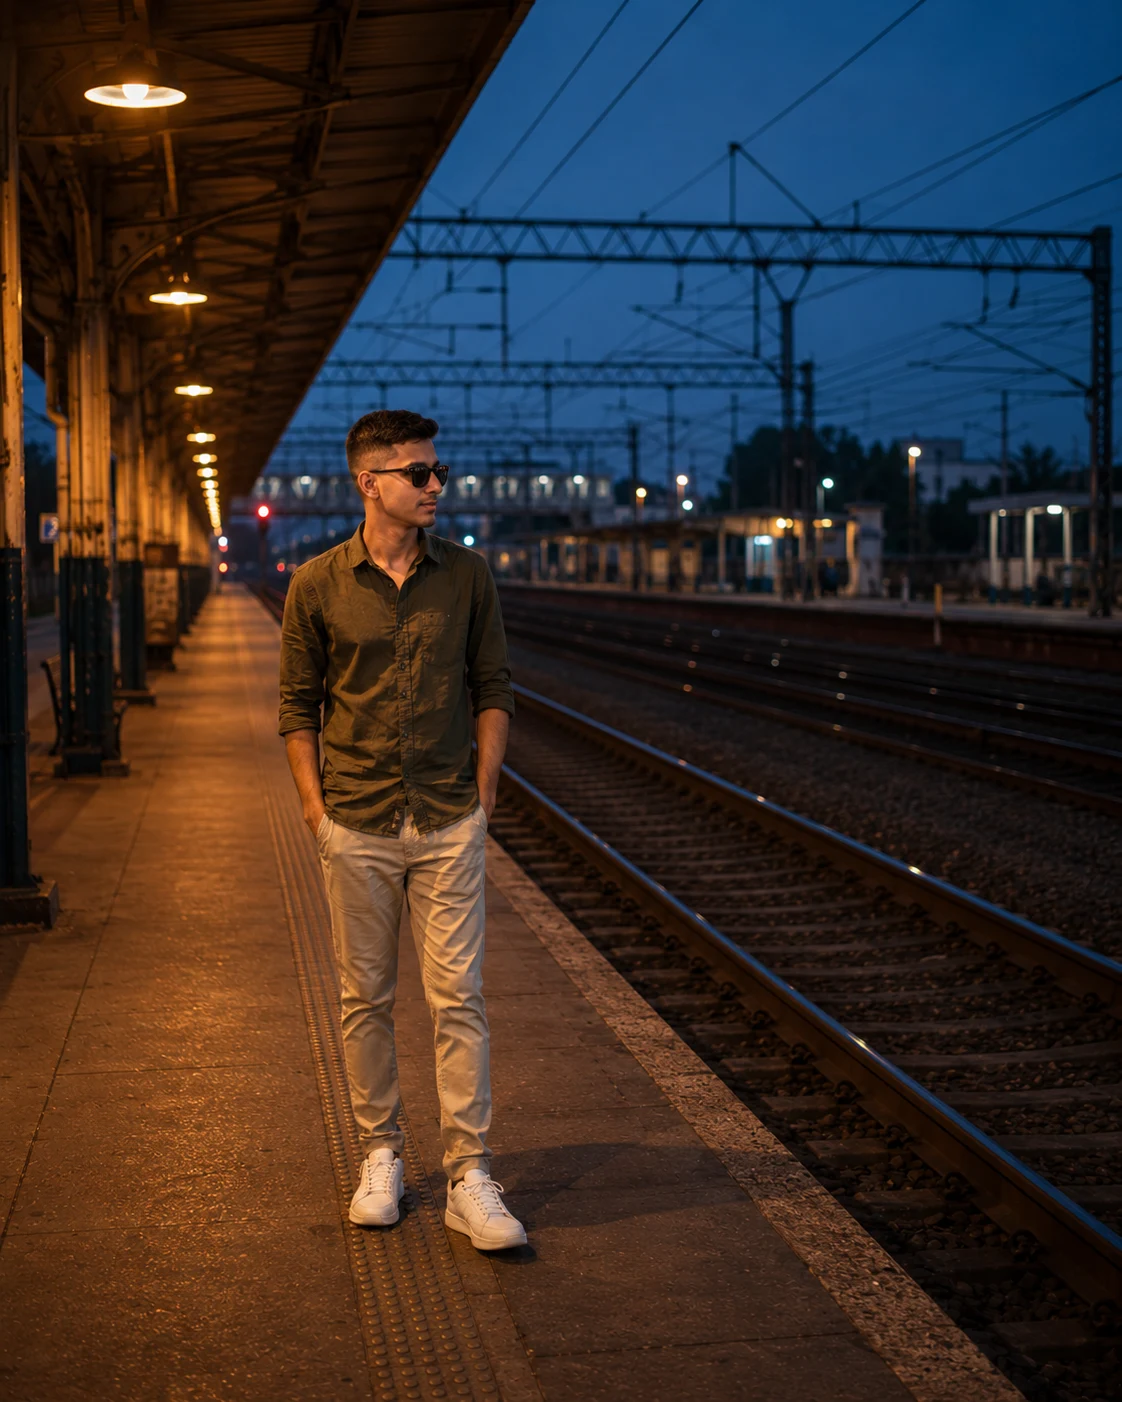
Platform-Edge Reflection Shot
A low camera angle changes the mood immediately. Instead of making the person look small against the station, the frame gives them a stronger presence while the distant lights provide depth. Keep the person away from any dangerous-looking action; the visual idea is standing and looking toward the tracks, not stepping onto them.
The Prompt
Using the uploaded photo, create a realistic cinematic railway-platform portrait of the same person standing safely on the platform and looking toward the railway tracks, with the full body visible from head to feet. KEEP - Keep the exact face structure from the uploaded photo, including jawline, cheek shape, nose, lips, chin and natural facial proportions. Keep the original eye shape and natural eye colour without enlargement or reshaping. Keep the original skin tone and visible skin texture, including pores, freckles, marks and fine lines. Keep the original hairline, hair texture, hairstyle characteristics and facial hair if present. Keep the person's natural age and complete body proportions, including shoulder width, torso length, waist, arms, hands, legs and overall build. Do not make the person taller, shorter, slimmer or broader. CHANGE - Dress the person in a [wardrobe choice] made from realistic [fabric], using [main colour] with subtle folds and believable fabric weight. Place them on a clean railway platform beside two visible dark steel tracks. Use a relaxed standing pose with the body angled slightly toward the tracks while remaining completely on the platform. Add warm amber platform lighting, cool blue-hour ambient light and a restrained cinematic colour grade. SCENE - Set the portrait shortly after sunset during blue hour. Show repeating platform lamps, rails, overhead railway structures and distant station details behind the person. Keep nearby tracks recognisable, while distant lights and structures become softly blurred to create depth without hiding the railway setting. LIGHT - Light the face mainly from the front-left using a warm 3200K platform lamp. Add soft blue ambient light from above and a weaker neutral fill from the right. Keep facial shadows consistent with the direction of the station lighting so the person does not look composited into the scene. CAMERA - Use a 50mm lens at f/2.8 from a slightly low camera position around waist-to-chest height, angled upward gently while keeping the full silhouette visible. Use moderate background compression without cropping the feet or railway environment. GRADE - Use warm amber highlights, cool blue shadows, medium contrast and natural skin tones. Keep the grade restrained, with subtle film-like texture and no heavy teal-orange processing or artificial glow. OUTPUT - Create a realistic vertical 4:5 image at 2048 × 2560 resolution, keeping the complete person visible with comfortable space around the silhouette. DO-NOT - No face slimming, no skin whitening, no changed eye colour, no plastic smoothing, no invented jewellery or tattoos, and no altered body proportions.
✦ Curated by MFDA
Walking Beside the Train
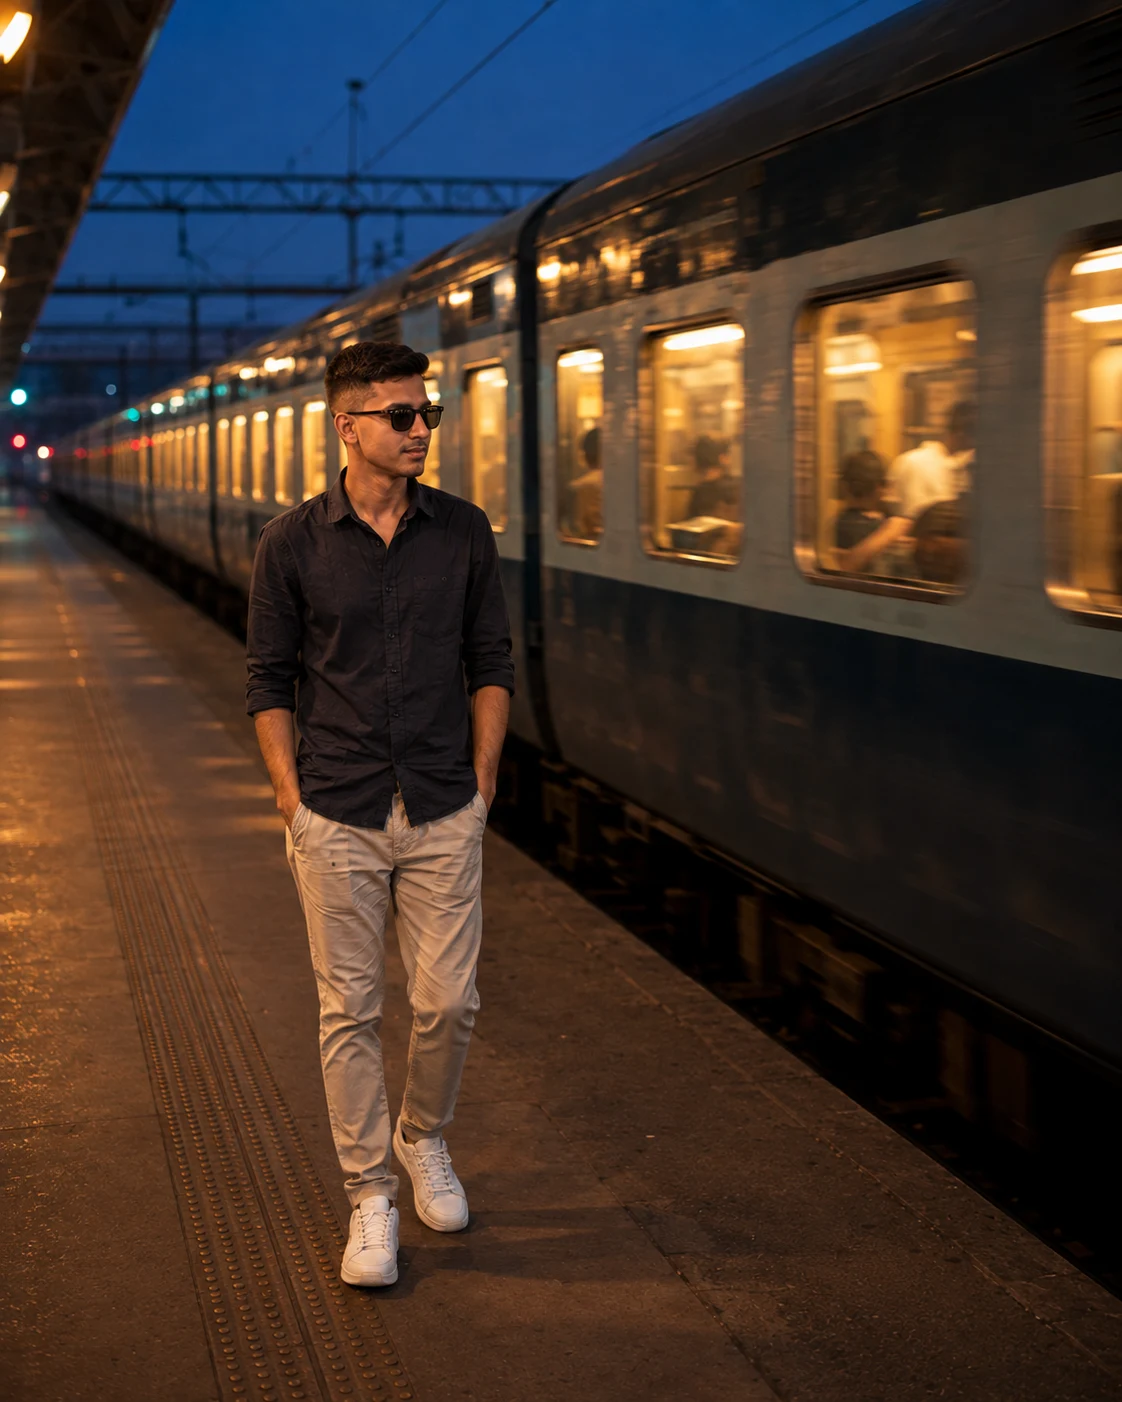
This shot adds controlled movement and repeating light patterns. As the camera travels beside the subject, illuminated train windows can create a natural rhythm in the background. A chest-height tracking shot is useful because it keeps attention on the person while still showing enough of the train to establish the location.
The Prompt
Using the uploaded photo, create a realistic cinematic railway-platform portrait of the same person standing safely on the platform beside a stationary or slowly passing train, photographed from a controlled tracking position as repeating illuminated train windows form a rhythmic background. KEEP - Keep the exact face structure from the uploaded photo, including jawline, cheek shape, nose, lips, chin and natural facial proportions. Keep the original eye shape and natural eye colour exactly as shown. Keep the original skin tone and visible texture, including pores, freckles, marks, fine lines and natural imperfections. Keep the original hairline, hair texture, hairstyle characteristics and facial hair if present. Keep the person's natural age and complete body proportions, including shoulder width, torso length, waist, arms, hands, legs and overall build. Preserve the person's recognizable identity without making the face younger, thinner or more symmetrical. CHANGE - Dress the person in [wardrobe choice] made from [fabric], using [main colour] with realistic folds and material texture. Change the setting to a railway platform at blue hour, with [train colour] train coaches running or standing behind them. Use a natural walking or paused mid-stride pose with relaxed arms and one foot slightly ahead. Add warm train-window light, cooler platform ambience and subtle directional illumination across the face. Create controlled environmental motion while keeping the person sharply defined. SCENE - Place the person safely on the platform shortly after sunset. Position a train parallel to the subject behind them, with rows of glowing rectangular windows repeating into the distance. Keep the nearest train details recognisable while allowing farther windows, rails and station structures to soften gradually through moderate background blur and movement. LIGHT - Light the face primarily from the front-left with warm 3200K illumination influenced by the train windows. Add soft blue-hour ambient light from above and a weaker neutral fill from the right. Keep highlights and shadows aligned with the train and platform so the face looks naturally embedded in the scene. CAMERA - Use a 50mm lens at f/2.8 from chest height, with a subtle tracking-shot perspective parallel to the train. Keep the person sharp while allowing mild background motion and window streaking. GRADE - Use warm amber highlights, cool blue shadows, medium contrast and natural skin tones. Add restrained film-like texture without heavy teal-orange processing or excessive glow. OUTPUT - Create a realistic vertical 4:5 image at 2048 × 2560 resolution, showing the person fully from head to feet with enough train and platform visible to establish the railway setting. DO-NOT - No face slimming, no skin whitening, no changed eye colour, no plastic smoothing, no invented jewellery or tattoos, and no altered body proportions.
✦ Curated by MFDA
Empty Platform Overhead Shot
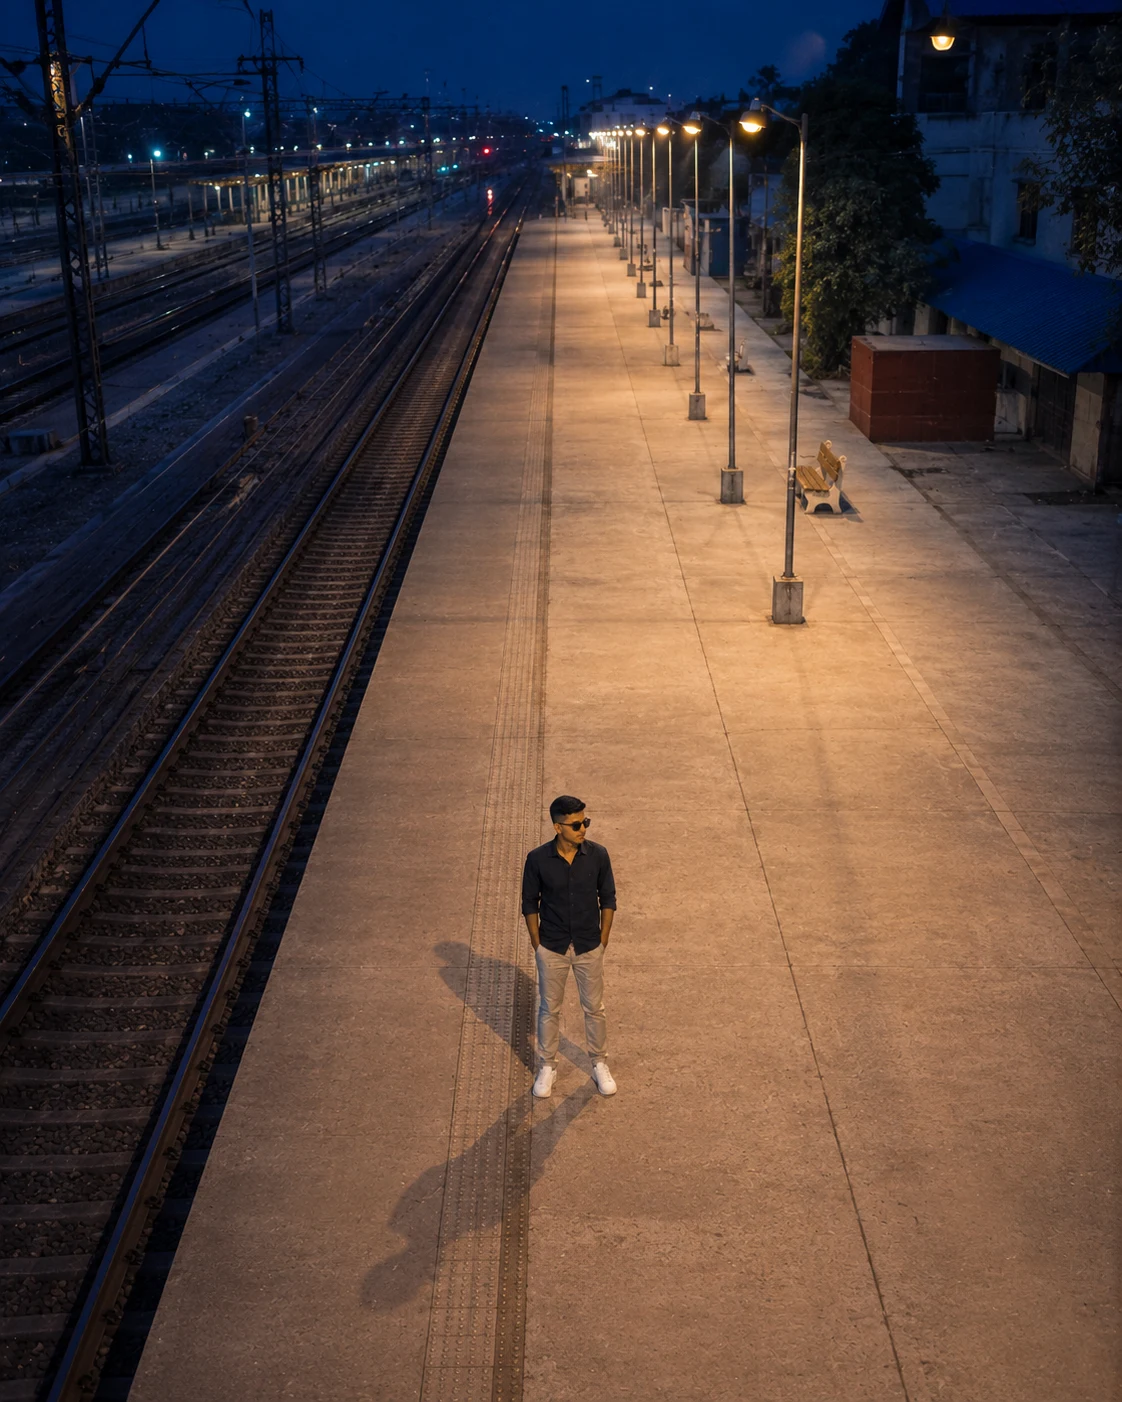
The overhead composition works because the person becomes a small figure surrounded by a large, mostly empty platform. A symmetrical frame, long shadow and scattered station lights create the feeling of being alone without requiring an exaggerated facial expression. This is also a useful transition shot because it visually breaks up the closer camera angles.
The Prompt
Using the uploaded photo, create a realistic cinematic railway-platform portrait showing the same person as a small full-body figure surrounded by the spacious geometry of an almost empty station platform. KEEP - Keep the exact face structure from the uploaded photo, including jawline, cheek shape, nose, lips, chin and natural facial proportions. Keep the original eye shape and natural eye colour. Keep the original skin tone and visible skin texture, including pores, freckles, marks and fine lines. Keep the original hairline, hair texture and facial hair if present. Keep the person's natural age and complete body proportions, including shoulder width, torso length, waist, arms, hands, legs and overall build. Do not alter height, body shape or recognizable identity even though the overhead camera makes the person appear smaller in the frame. CHANGE - Dress the person in [wardrobe choice] made from realistic [fabric], using [main colour] with natural folds and believable weight. Change the setting to a clean, mostly empty railway platform with pale concrete or stone surfaces, dark steel rails and evenly spaced station lights. Use a relaxed standing pose with the person positioned centrally or slightly below centre, facing naturally along the platform. Add a long directional shadow extending behind or beside the person and keep the platform geometry strongly visible. SCENE - Set the image during blue hour shortly after sunset. Show long parallel platform edges, visible railway tracks, repeating overhead lights and sparse distant station structures. Leave generous negative space around the person. Keep nearby platform details sharp enough to define the location, while distant lights and structures become progressively softer. LIGHT - Use warm 3200K station lights from above and slightly behind the subject, creating a clearly readable long shadow. Add soft cool blue ambient light from the open sky. Keep the shadow direction consistent with the visible lamps and maintain natural exposure on the person. CAMERA - Use a 35mm lens at f/4 from a high overhead camera position approximately 8–12 metres above the platform. Keep the frame symmetrical and level, with strong leading lines guiding toward the distant station. GRADE - Use cool blue shadows, warm amber lamps, medium contrast and restrained film-like grain. Preserve natural skin colour and avoid heavy teal-orange processing. OUTPUT - Create a realistic vertical 4:5 image at 2048 × 2560 resolution, keeping the entire person visible with substantial empty platform space around them. DO-NOT - No face slimming, no skin whitening, no changed eye colour, no plastic smoothing, no invented jewellery or tattoos, and no altered body proportions.
✦ Curated by MFDA
Pillar Lean With Station Bokeh
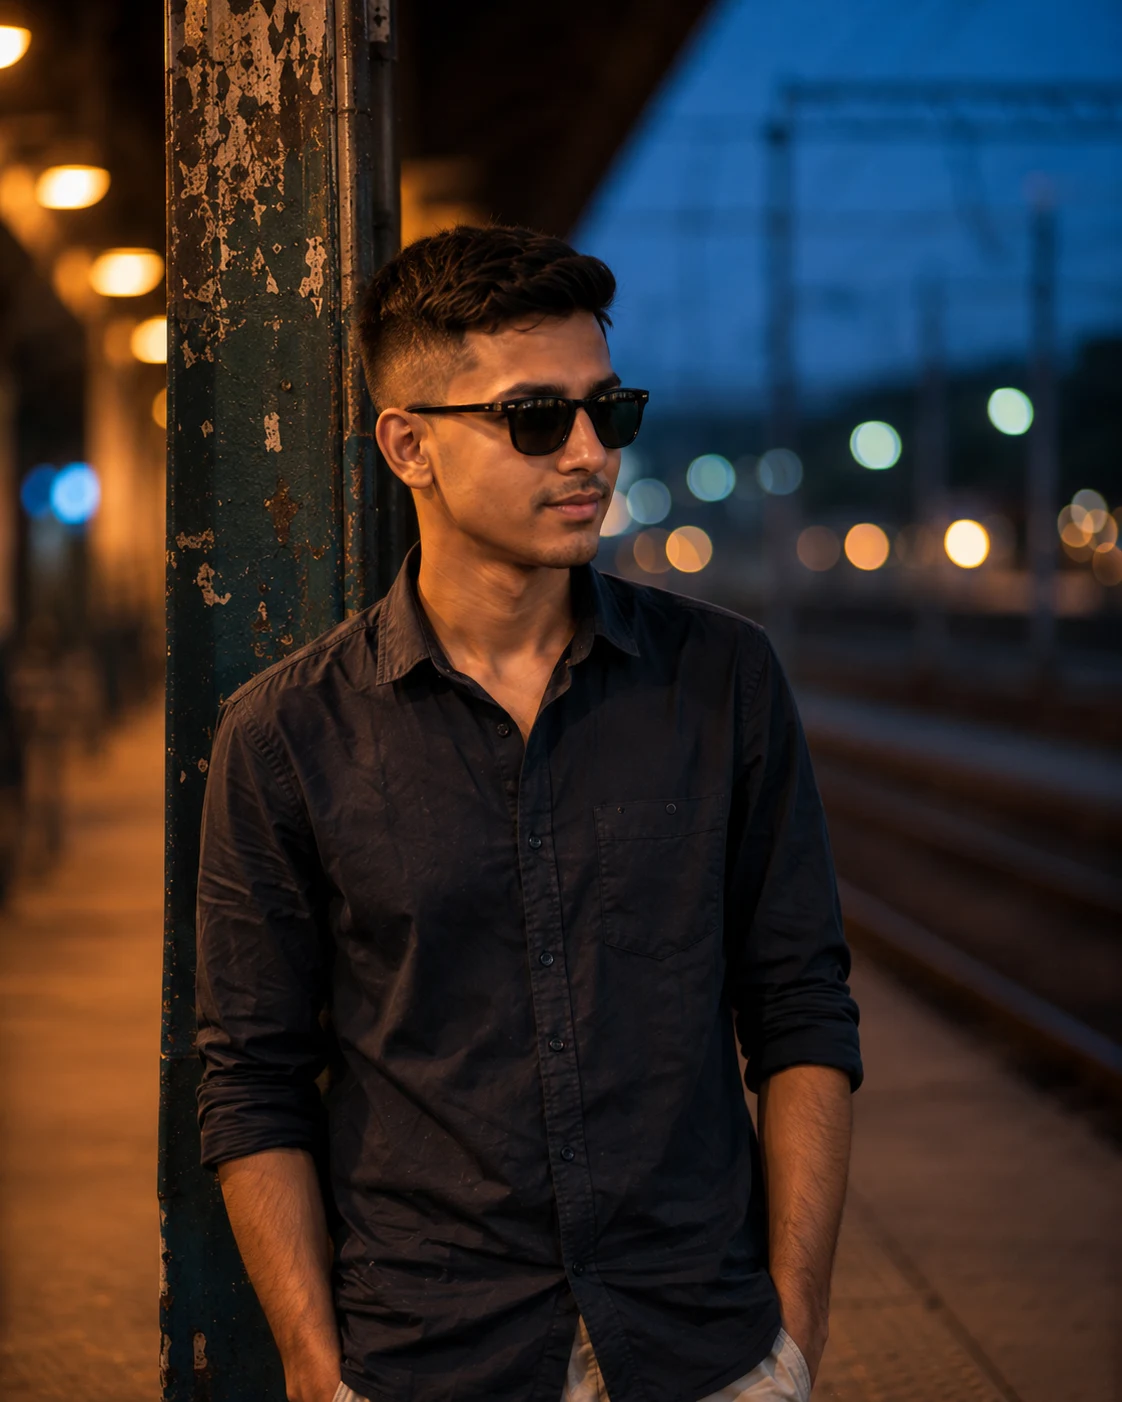
This closer portrait gives the sequence a more personal ending. Leaning against a pillar provides a natural pose, while out-of-focus lights add depth behind the face. Keep the expression subtle and let the lighting do most of the emotional work. Warm light across one side of the face is more convincing than uniformly bright skin.
The Prompt
Using the uploaded photo, create a realistic cinematic close railway-platform portrait of the same person leaning naturally against a station pillar, with warm light falling across one side of the face and distant station lights softly blurred behind them. KEEP - Keep the exact face structure from the uploaded photo, including jawline, cheek shape, nose, lips, chin and natural facial proportions. Keep the original eye shape and natural eye colour without enlargement, reshaping or artificial sharpening. Keep the original skin tone and visible texture, including pores, freckles, marks, fine lines and natural imperfections. Keep the original hairline, hair texture, hairstyle characteristics and facial hair if present. Keep the person's natural age and complete body proportions, including shoulder width, torso length, waist, arms and overall build. Preserve the person's recognizable identity even in this closer framing. CHANGE - Dress the person in [wardrobe choice] made from realistic [fabric], using [main colour] with subtle folds and believable material texture. Place them beside a textured railway-station pillar made from [pillar material]. Use a relaxed leaning pose with one shoulder or upper back resting lightly against the pillar, while the head remains naturally upright. Keep the expression subtle and calm. Add warm directional station lighting across one side of the face and cooler ambient light on the opposite side. Replace the background with distant railway lights and platform details rendered as soft circular bokeh. SCENE - Set the portrait on a railway platform shortly after sunset during blue hour. Place the pillar close beside the person while the platform, distant lamps and railway structures recede behind them. Keep the background recognizable as a station but strongly defocused, with warm lamps forming layered bokeh rather than sharp points. LIGHT - Use a warm 3200K light from the front-left, illuminating one side of the face and catching the cheek, nose bridge and clothing edge. Add soft cool blue ambient fill from the right. Keep the opposite side slightly darker so the face has natural depth rather than uniform brightness. CAMERA - Use an 85mm lens at f/1.8 from chest height, focused precisely on the nearer eye. Use shallow depth of field to separate the face from the pillar and distant station lights. GRADE - Use warm amber highlights, cool blue shadows, medium contrast and natural skin tones. Add restrained film grain without excessive glow or heavy teal-orange processing. OUTPUT - Create a realistic vertical 4:5 image at 2048 × 2560 resolution, framed from approximately waist or mid-torso upward while keeping enough pillar and station bokeh visible. DO-NOT - No face slimming, no skin whitening, no changed eye colour, no plastic smoothing, no invented jewellery or tattoos, and no altered body proportions.
✦ Curated by MFDA
Slow Push-In Finale
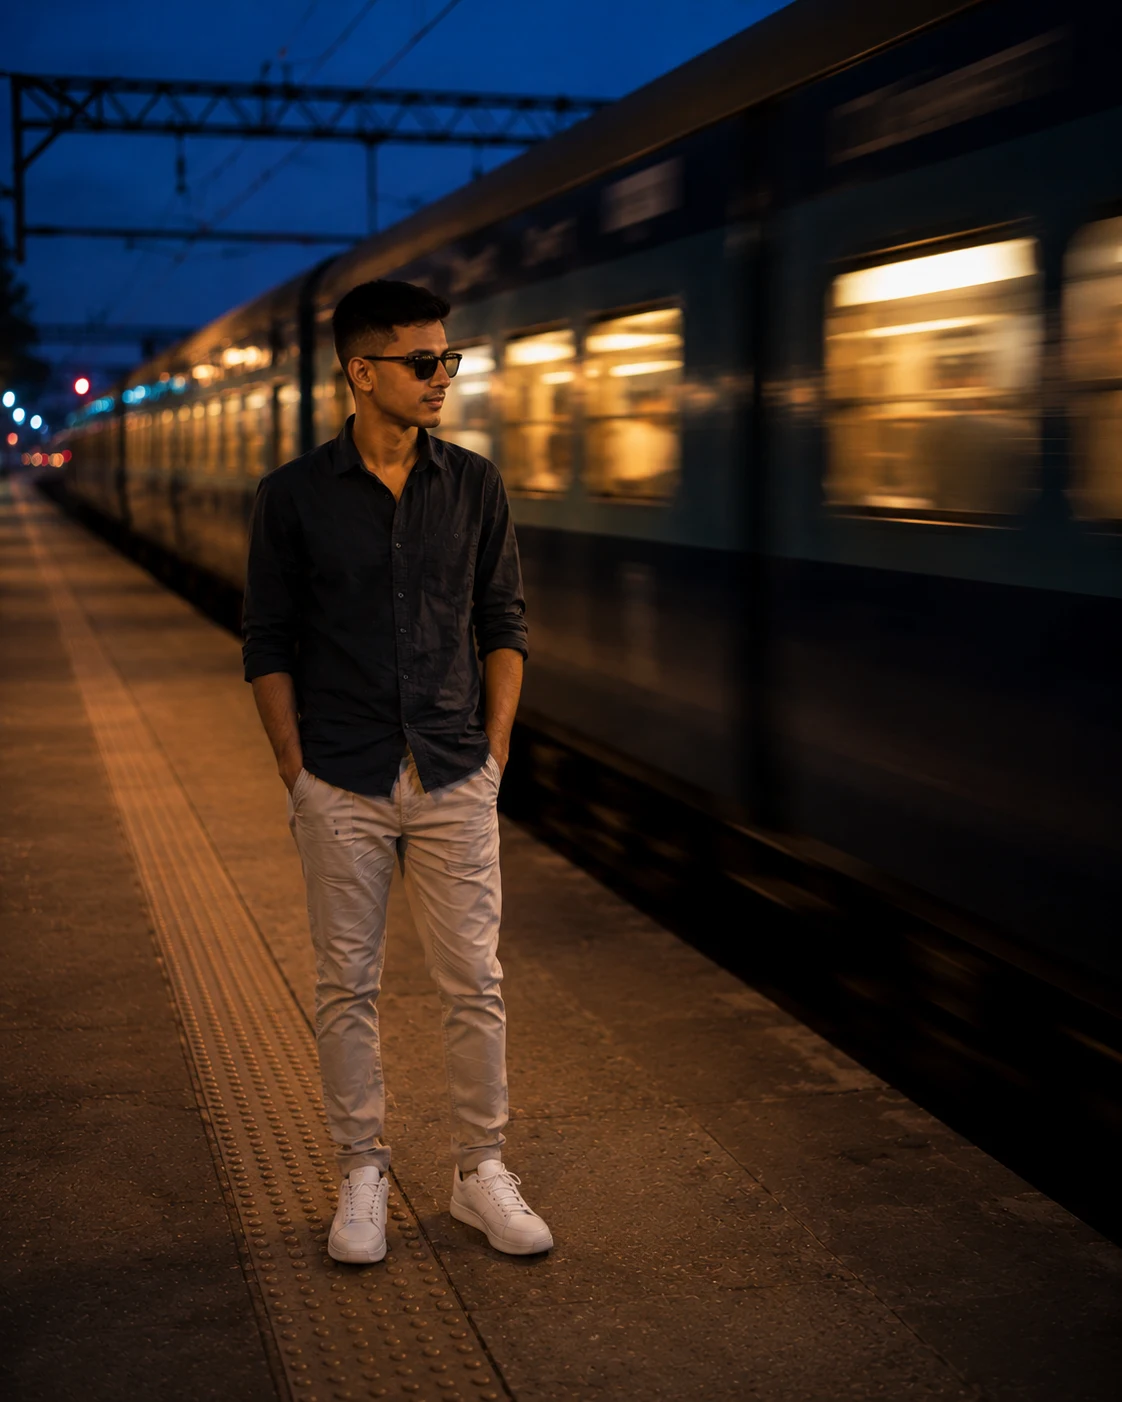
A slow camera push can work as the closing moment of the sequence. The person faces the tracks while a passing train briefly changes the illumination across their face. The important detail is restraint: the camera should move gradually, and the lighting change should feel caused by the train rather than added as a random flash.
The Prompt
Using the uploaded photo, create a realistic cinematic closing portrait of the same person standing safely on a railway platform and facing toward the tracks as a passing train briefly changes the light across their face. KEEP - Keep the exact face structure from the uploaded photo, including jawline, cheek shape, nose, lips, chin and natural facial proportions. Keep the original eye shape and natural eye colour exactly as shown. Keep the original skin tone and visible texture, including pores, freckles, marks, fine lines and natural imperfections. Keep the original hairline, hair texture, hairstyle characteristics and facial hair if present. Keep the person's natural age and complete body proportions, including shoulder width, torso length, waist, arms, hands, legs and overall build. Preserve their recognizable identity even when the train light changes across the face. CHANGE - Dress the person in [wardrobe choice] made from realistic [fabric], using [main colour] with natural folds and believable weight. Place them safely beside the platform edge but clearly behind the safety line, facing the tracks with a calm, restrained posture. Change the background to a railway platform with a passing [train colour] train, dark rails and distant station lights. Create a subtle lighting transition across the face caused by the moving train rather than an artificial flash. SCENE - Set the scene during blue hour shortly after sunset. Keep the person stationary on the platform while the train moves parallel to them in the background. Let nearby train windows remain partly recognizable, with moderate motion blur and softer distant lights. Keep the railway environment visible enough to establish the location without competing with the face. LIGHT - Start with soft cool blue-hour ambient light from above and behind. Add warm 3200K illumination from passing train windows moving across the face from one side to the other. Keep the transition gradual, with highlights appearing first on the nearer cheek and face edge rather than lighting the entire face uniformly. CAMERA - Use a 50mm lens at f/2.8 from chest height, with a subtle slow camera-push perspective. Keep the person sharply focused while the passing train shows controlled horizontal motion blur. GRADE - Use cool blue shadows, warm amber highlights, medium contrast and natural skin tones. Keep the colour shift restrained and film-like, without artificial flash effects or heavy teal-orange processing. OUTPUT - Create a realistic vertical 4:5 image at 2048 × 2560 resolution, keeping the person fully visible from head to feet with the train and platform environment included. DO-NOT - No face slimming, no skin whitening, no changed eye colour, no plastic smoothing, no invented jewellery or tattoos, and no altered body proportions.
✦ Curated by MFDA
How to use these in Gemini
Open Gemini and start an image/video generation request that supports an uploaded reference photo.
Upload a clear personal photo before adding the selected prompt card.
Keep the requested 9:16 vertical ratio if Gemini exposes an aspect-ratio option.
Generate one prompt at a time rather than asking for all seven scenes as separate experiments.
Check the face, hands, clothing and body proportions before using the result in an edit.
If the first result changes the face or produces a weak railway setting, regenerate with the same reference image and make the identity, clothing continuity and camera direction the priority.
Gemini's available generation features and controls can change, so don't assume every account exposes exactly the same video settings.
Getting better results
Start with even lighting on your reference photo because harsh shadows make facial features harder for the model to reproduce consistently.
Use a photo with visible shoulders and torso because the model has more information for maintaining body proportions and clothing.
Keep the outfit simple because complicated patterns, logos and accessories are more likely to change between frames.
Use one location throughout the sequence because changing environments can make the final video feel like unrelated clips.
Prefer subtle expressions because exaggerated sadness or smiles often look less natural in realistic AI footage.
Keep camera movements physically plausible because slow tracking, push-ins and overhead shots are easier to read as real cinematography than sudden impossible movements.
Check hands and footwear carefully because these areas can still show generation errors even when the face looks convincing.
When the result comes out wrong
What went wrong | Why it happens | What to change |
|---|---|---|
Face looks different | The reference image doesn't provide enough clear facial information | Use a sharper photo with the face unobstructed and explicitly prioritize identity consistency |
Clothes change between shots | The model treats each scene as a new composition | Keep the exact clothing description consistent |
Railway station looks artificial | Background details are too generic or inconsistent | Specify platform lighting, train coaches, signage and realistic station materials |
Hands or shoes look distorted | Small body details are harder to generate during movement | Use simpler poses and regenerate the affected scene |
Video feels like disconnected clips | Camera direction and location aren't consistent | Keep the same environment and define a clear progression of shots |
Night scene is too dark | The model interprets "night" as very low exposure | Ask for visible subjects, practical station lighting and controlled cinematic shadows |
FAQ
Can I use my own face for these railway station AI videos?
Yes. Upload a clear photo of yourself and use it as the reference image. For the most consistent result, choose a picture where your face isn't covered by sunglasses, hair or a heavy filter. AI generation can still alter facial details, so always inspect the finished clip before publishing it.
Will Gemini keep my face exactly the same?
Not necessarily. A reference image helps maintain identity, but generative video can still change facial proportions, skin details, hair or expressions between frames. Better source photos and simpler movements generally help. If identity consistency is critical, check several generated frames rather than judging the video from its opening shot alone.
Can I use these videos on Instagram?
Yes, you can create them in a vertical 9:16 format suited to Reels and similar platforms. Before posting, check the current platform's content and monetization rules. Also avoid presenting an AI-generated railway scene as real footage if doing so could mislead viewers.
Can I use the generated video commercially?
Commercial use depends on the tool's current terms, your account or plan, and the assets included in your project. Your own photograph may also have separate rights considerations. Check Gemini's current terms before using generated footage for paid advertising, client work or monetized commercial content.
Is Gemini free for making these videos?
Gemini has offered different features and access levels depending on the account, region and product plan. Video-generation availability can also change. If video generation isn't available on your account, you may see a limitation or be directed toward a paid feature.
What photo should I upload for the best result?
Use a sharp, unfiltered image with your face clearly visible and enough of your body included to establish proportions. A simple standing photograph is usually a safer starting point than a heavily edited selfie. Avoid extreme angles, motion blur and photos where another person is partially covering you.
Why does my video look good but the face changes?
Video generation has to synthesize multiple frames, so identity can drift as the camera moves or the subject changes pose. Reduce complicated movements, use a strong reference photo and regenerate the weakest scene instead of repeatedly changing every part of the prompt.
Closing
A convincing railway-station video isn't only about adding the words “cinematic” or “4K.” The useful parts are the reference photo, consistent clothing, believable camera movement, controlled lighting and a clear sequence of shots. Start with one scene, check the identity and hands, then build the rest around the strongest result.
Tags
About the Author
Naziya
Creative AI writer at MFDA, sharing trendy photo-editing prompts and fresh ideas for beautiful, stylish AI images.