5 Men Eye Prompts for Gemini 2026
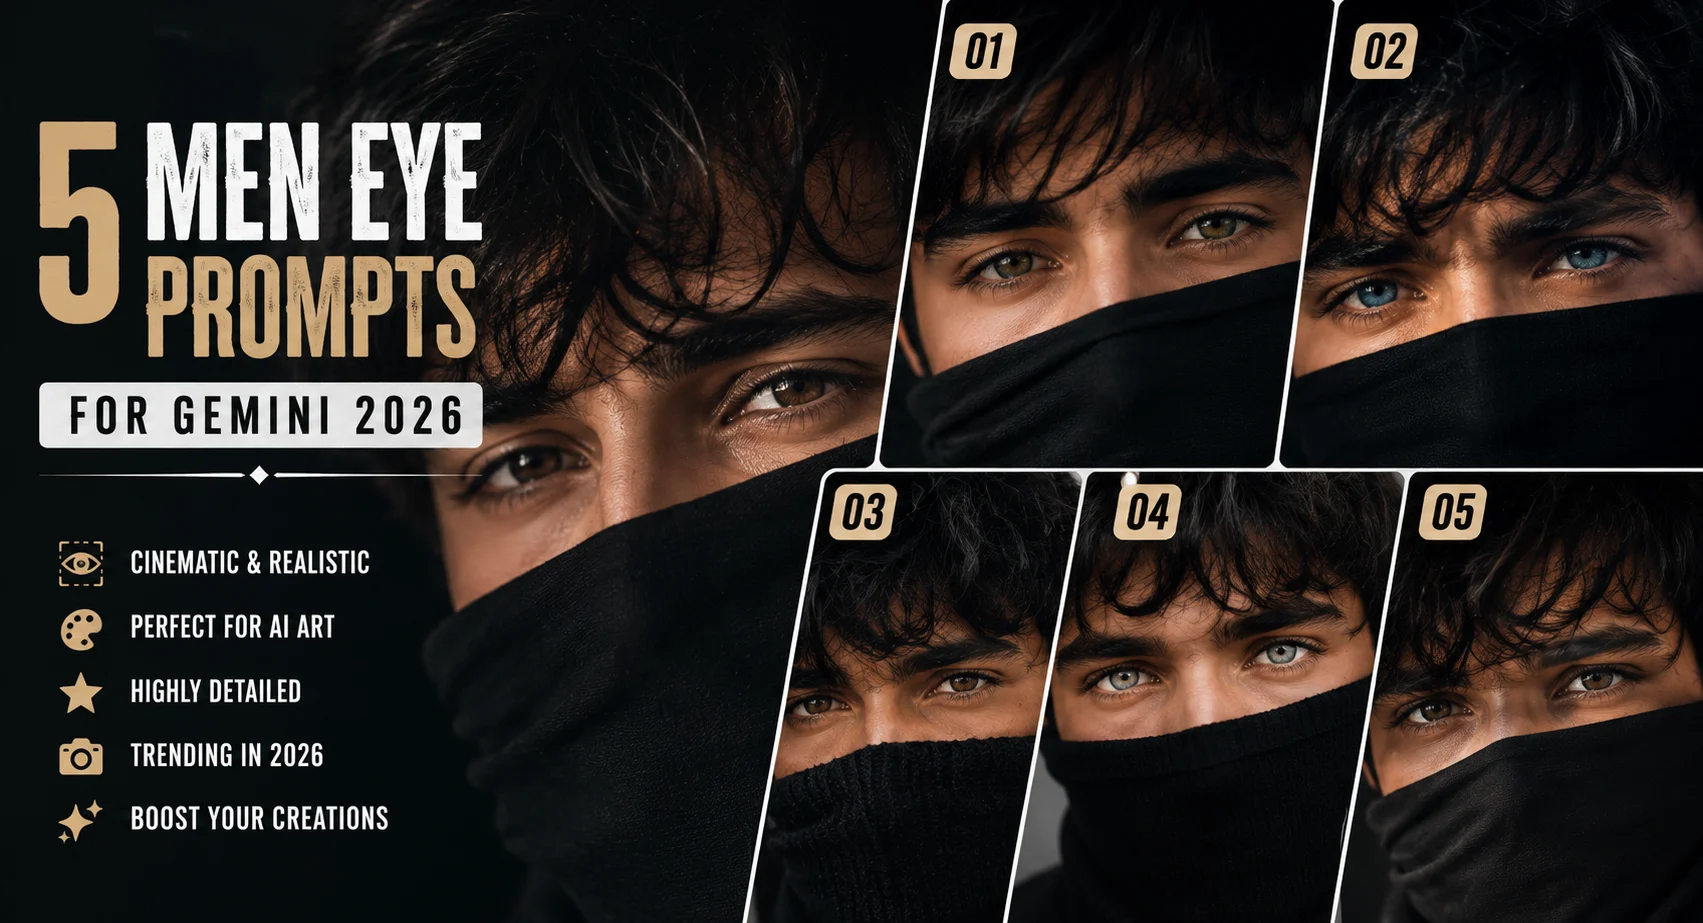
A good men eye prompt should change the eyes without making the whole face look synthetic. I tested these styles with that problem in mind: the strongest results keep the original facial structure while making the eyes more noticeable. The difference is especially clear in close portraits, where small changes to the iris can otherwise make the person look like someone else. These five options cover natural brown, green, blue, hazel and cinematic eye treatments. They work best when your uploaded photo already has a reasonably sharp face. If you're creating a profile photo, Instagram portrait or cinematic male edit, start with the most natural option before trying the stronger looks.
Before you start
Use a clear front-facing or slightly turned portrait where both eyes are visible. Avoid sunglasses, heavy shadows across the eyes and extremely blurry selfies. Gemini works better when the source face is large enough to inspect.
Photo: sharp male portrait, preferably original resolution
Tool: Google Gemini with image generation/editing
Aspect ratio: 4:5 for social portraits; 1:1 for profile photos
Best lighting: open shade or soft window light
Natural Deep-Brown Eyes With Crisp Detail
This version keeps the change restrained, so it suits everyday portraits and profile pictures. The eyes gain definition without looking artificially bright. It works particularly well on men with dark hair and neutral clothing. The important detail is the preserved iris texture; overly smooth brown eyes can make an otherwise realistic portrait look generated.

The Prompt
Using the uploaded photo, create a realistic portrait with naturally deep-brown eyes and crisp iris detail while keeping the person recognisably the same. KEEP: Keep the exact face structure, eye shape and natural eye colour, skin tone and visible skin texture, hairline, facial hair, and body proportions from the uploaded photo. Preserve the original eyebrow shape, eyelid structure, nose, lips, jawline, cheek placement, forehead width, and natural facial asymmetry. Keep the person’s actual age appearance and distinctive facial marks rather than rebuilding the face. The eyes must remain the same shape and placement; only their existing brown colour and iris definition should be refined subtly. CHANGE: Change the wardrobe to a simple matte charcoal or deep navy cotton shirt with a natural fabric weave and no visible logos. Change the background to a softly blurred neutral outdoor setting with muted beige, olive, and warm grey tones. Use a relaxed three-quarter portrait pose with the shoulders slightly turned while the head remains naturally oriented toward the camera. Change the lighting to soft late-afternoon daylight and apply a restrained warm-neutral colour grade. SCENE: Place the subject outdoors during late afternoon, standing near a quiet textured wall with faint greenery several metres behind them. Keep the background strongly blurred so it supports the portrait without creating sharp objects around the face. LIGHT: Light the face from the front-left at roughly 45 degrees using soft natural daylight. Keep the shadow side gentle, retain realistic skin texture, and use a slightly warm 4800–5200K colour temperature so the face does not look cut out from the scene. CAMERA: Photograph at 85mm, f/1.8, camera positioned at chest height, with natural perspective and shallow depth of field. Keep both eyes within the sharp focus plane, with the iris texture visible without artificial sharpening. GRADE: Use a warm-neutral documentary portrait grade with moderate contrast, realistic skin saturation, soft highlight roll-off, and no glossy beauty retouching. OUTPUT: Create a vertical 4:5 image at 2048 × 2560 pixels, with realistic photographic detail suitable for a profile picture. DO-NOT: no face slimming, no skin whitening, no changed eye colour, no plastic smoothing, no invented jewellery or tattoos. Do not enlarge the eyes, reshape the iris, remove natural facial texture, alter the hairline, or add artificial catchlights that were not supported by the lighting.
✦ Curated by MFDA
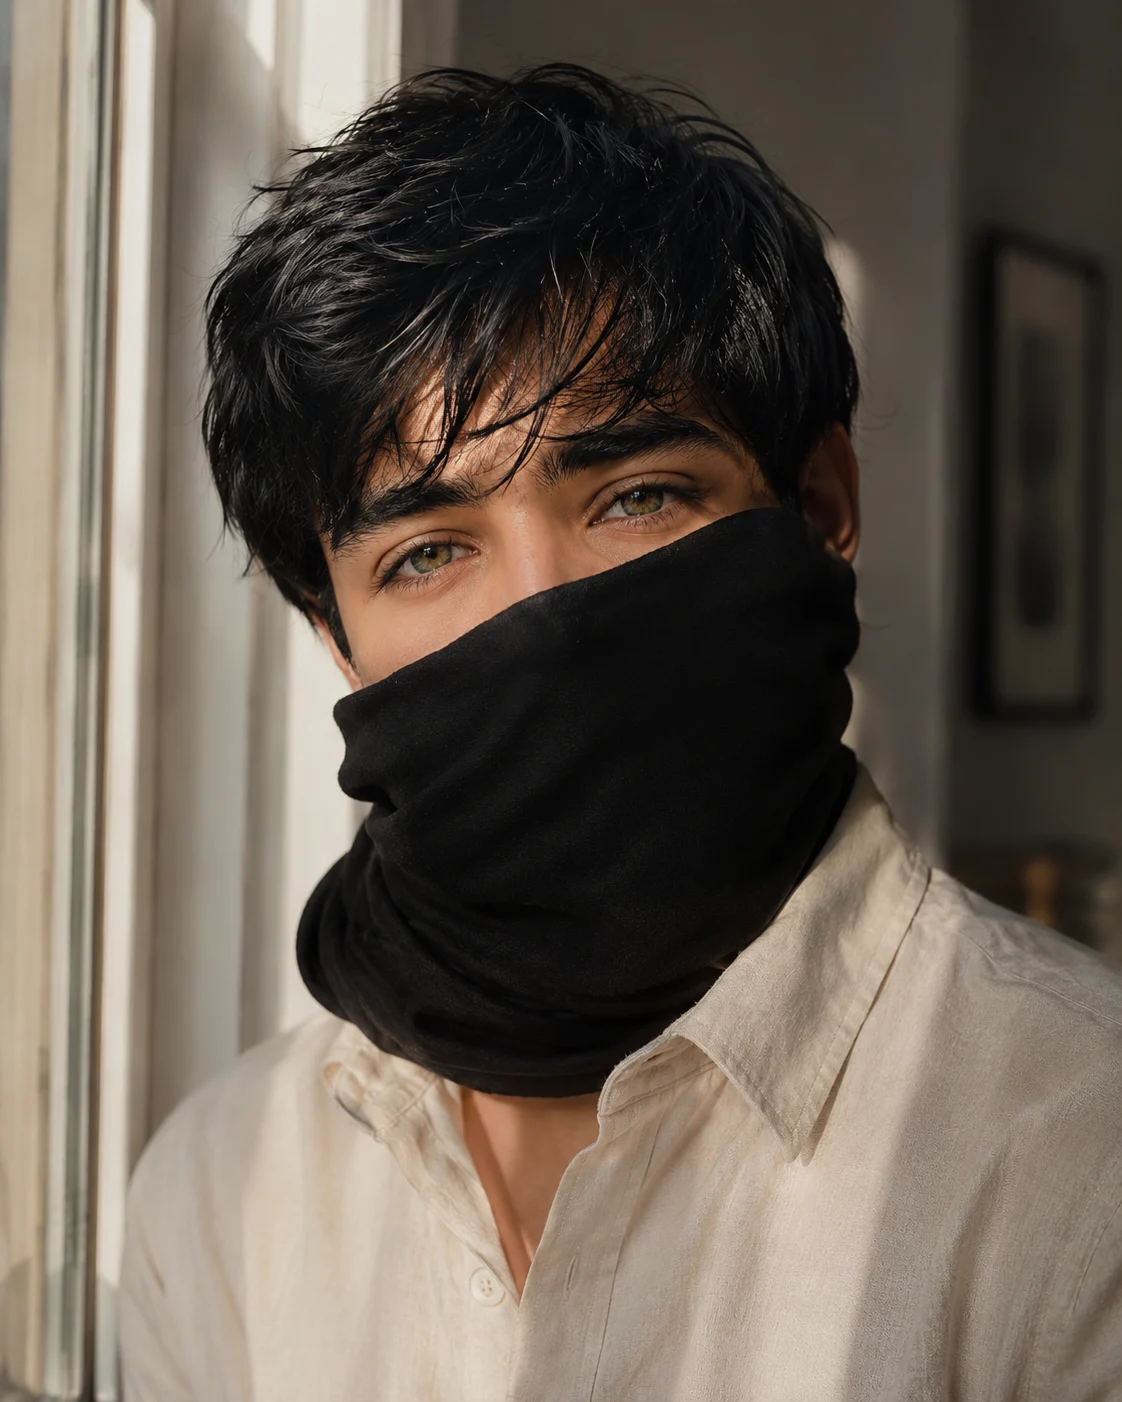
Soft Green Eyes With Window-Light Contrast
Green eyes can look striking without becoming neon. This treatment is most convincing when the original photo already has soft illumination around the face. A plain cotton shirt or dark jacket also helps the eye color stand out naturally. Keep the green muted rather than saturated, especially if you're using a close-up crop.
The Prompt
Using the uploaded photo, create a realistic portrait with softly muted green eyes and gentle window-light contrast, while preserving the person's identity exactly. KEEP - Keep the face structure, eye shape and natural eye proportions unchanged. Keep the original eye colour characteristics and only shift the visible iris tone toward muted natural green. Keep skin tone, pores, fine texture, freckles, marks, and normal facial variation. Keep the hairline, hairstyle boundaries, and facial hair exactly as visible in the uploaded photo. Keep body proportions, shoulder width, neck shape, and overall build unchanged. CHANGE - Change only the wardrobe to a plain [cream cotton shirt] or [dark matte jacket], using real fabric texture without logos or patterns. Change the pose to a relaxed [three-quarter portrait pose], keeping the head at a natural angle. Change the background to a softly lit interior beside a large window. Change the lighting to soft directional daylight and use a restrained warm-neutral colour grade with moderate contrast. SCENE - Place the subject indoors beside a large window during [late morning]. Let the window sit just outside the frame on one side, with daylight falling across the face. Use a simple pale wall and subtle room shapes behind the subject, blurred enough that they remain recognizable as background rather than visual detail. LIGHT - Use soft light coming from approximately 45 degrees to the face, with gentle shadow falloff on the opposite cheek. Keep the daylight near 5200K so the skin remains believable and the green eyes do not become neon. CAMERA - Use an 85mm lens at f/1.8, camera positioned at chest height and focused precisely on the nearer eye. Keep natural facial perspective and mild background compression. GRADE - Apply a warm-neutral film-style grade with soft highlights, controlled blacks, moderate contrast, and muted greens. Keep the iris green subdued rather than fluorescent. OUTPUT - Create a vertical 4:5 image at 2048 × 2560 pixels with realistic photographic detail. DO-NOT - No face slimming, no skin whitening, no changed eye colour beyond muted green, no plastic smoothing, no invented jewellery or tattoos.
✦ Curated by MFDA
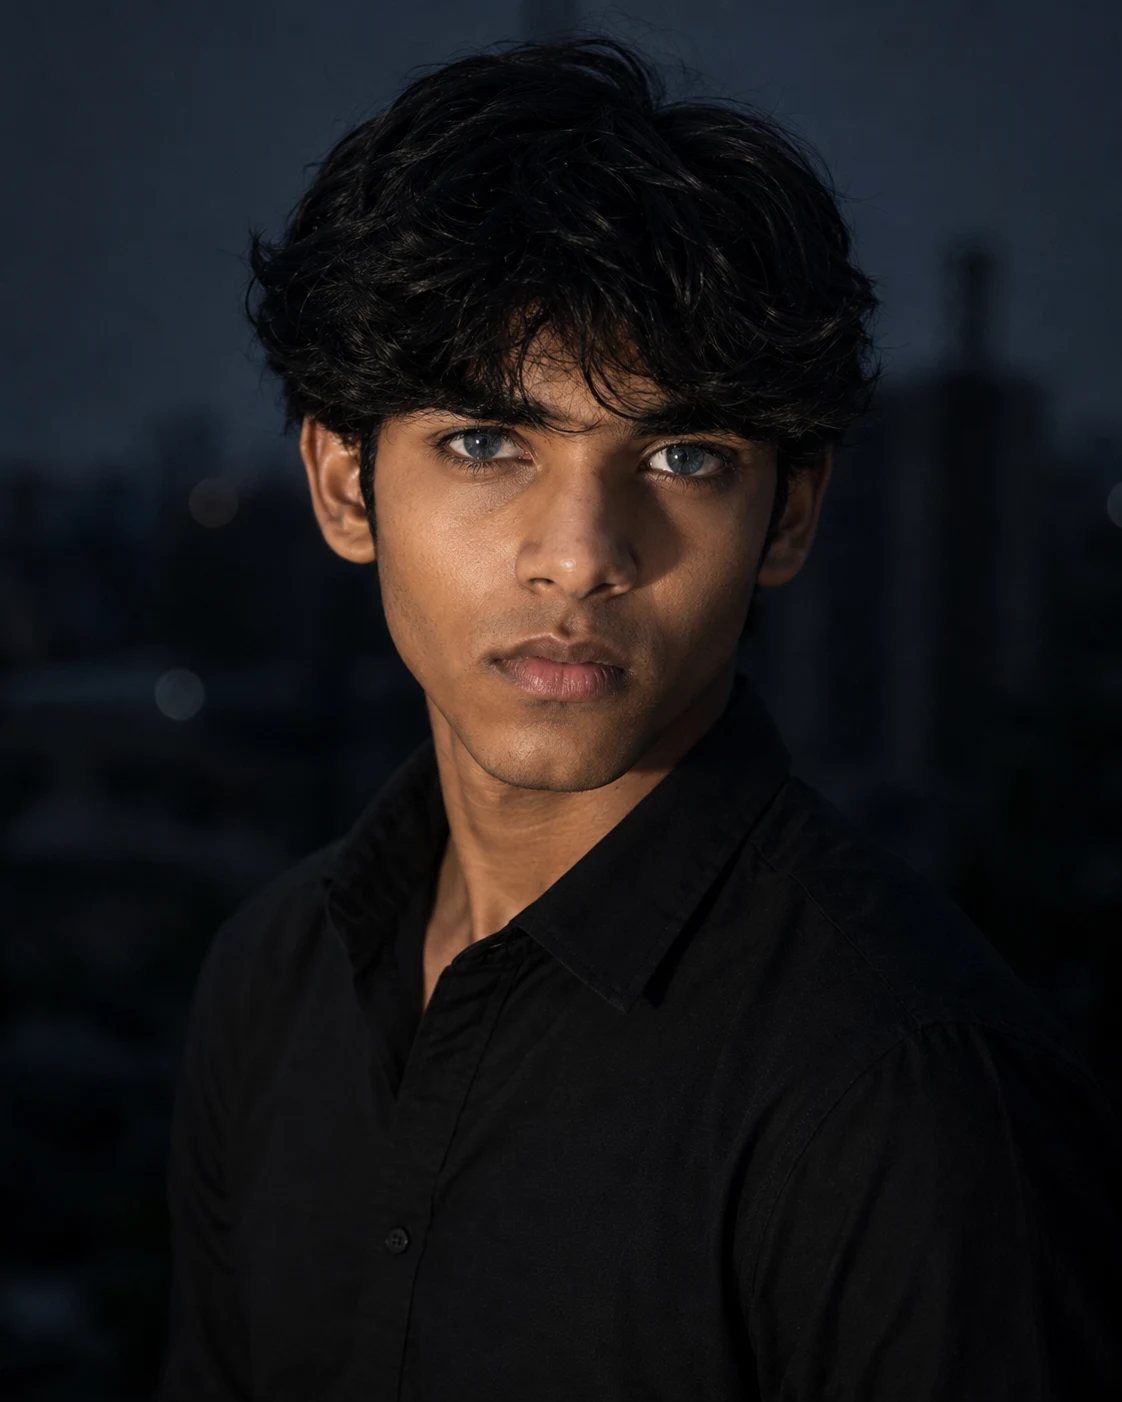
Cinematic Steel-Blue Eyes for a Moody Portrait
For a stronger editorial look, this style gives the eyes a cool steel-blue tone while retaining realistic shadows and fine iris detail. It suits evening portraits, black shirts and darker backgrounds. The key is keeping the whites of the eyes slightly warm; perfectly white eyes are one of the quickest ways to make the edit look fake.
The Prompt
Using the uploaded photo, create a cinematic moody editorial portrait with naturally realistic steel-blue eyes and controlled evening shadows. KEEP - Keep the exact face structure, including forehead, cheekbones, nose, lips, chin, jawline, and natural facial asymmetry. Keep the original eye shape, eyelid structure, pupil size, and natural eye spacing. Keep the uploaded eye colour only as the reference for iris texture and structure, but change the iris colour as specified below. Keep the original skin tone, pores, fine lines, and natural skin texture. Keep the exact hairline, hairstyle silhouette, and any existing facial hair pattern. Keep the person's real body proportions, neck width, and shoulder shape. Do not make the person slimmer, broader, younger, or older. CHANGE - Change the iris colour to a believable muted steel-blue with darker blue-grey depth around the outer iris and fine radial iris detail. Keep the eye whites slightly warm rather than pure white. Change the wardrobe to a fitted matte-black cotton shirt with a clean collar and no visible logos. Change the background to a deep charcoal-grey setting with subtle tonal separation. Change the pose to a relaxed three-quarter portrait, with the shoulders turned slightly away while the face remains naturally directed toward the camera. Change the lighting to soft directional evening light and apply a restrained cool cinematic grade. SCENE - Place the subject outdoors during blue hour, shortly after sunset. Use a dark charcoal urban background with distant, indistinct shapes kept heavily blurred. Keep the background quiet so the steel-blue eyes remain the visual focal point. LIGHT - Place the main soft light slightly above and 45 degrees to the camera-left, with gentle fill from the opposite side. Use a cool-neutral 4800K balance while preserving natural warmth in the skin and eye whites. CAMERA - Shoot at 85mm, f/1.8, camera positioned at chest height, with natural perspective and shallow depth of field. Keep both eyes within the sharp focus plane. GRADE - Use restrained steel-blue and charcoal tones, medium contrast, soft highlight roll-off, preserved skin warmth, and subtle cinematic film grain. Avoid excessive teal-and-orange colour separation. OUTPUT - Create a high-resolution 4:5 vertical portrait suitable for social media, with realistic fine detail and clean edges. DO-NOT - No face slimming, no skin whitening, no changed eye shape, no changed eye colour beyond steel-blue, no plastic smoothing, no altered hairline, no invented jewellery or tattoos, no exaggerated eye glow.
✦ Curated by MFDA
Icy Blue Eyes With Clean Editorial Lighting
This is the sharper fashion-style option. The eyes become pale blue but still show natural variation instead of one flat color. It works nicely with a 4:5 crop and a simple blazer or denim jacket. If your source image has glasses, expect this version to need another attempt because reflections can interfere with the eye edit.

The Prompt
Using the uploaded photo, create a polished fashion editorial portrait with pale icy-blue eyes and clean, controlled lighting. KEEP: Keep the exact face structure, facial proportions, eye shape, eyelid shape, natural iris detail, skin tone, real skin texture, hairline, facial hair if present, and original body proportions. Keep the person recognisable as the same individual. Keep natural facial asymmetry, including differences between the two eyes, cheeks, brows, and jaw. Keep the existing hair density and natural hair pattern rather than redrawing the hairstyle. CHANGE: Change the iris colour to a pale icy blue while preserving the original eye shape, pupil size, iris texture, and natural colour variation. Change the wardrobe to a sharply fitted charcoal-blue blazer over a plain white cotton shirt, with realistic wool-blend fabric texture and clean tailoring. Replace the original background with a minimal warm-grey editorial studio setting. Change the pose to a relaxed chest-up portrait with shoulders slightly turned and the face looking directly toward the camera. Change the lighting to soft directional editorial light and apply a restrained cool-neutral colour grade. SCENE: Place the subject in a clean studio during late afternoon-style simulated daylight. Use a smooth warm-grey background with no visible objects. Keep the background softly blurred but still visibly tonal, without artificial bokeh circles. LIGHT: Place a large soft light slightly above and 30 degrees to camera-left, with gentle fill from camera-right. Use neutral daylight around 5000K so the skin remains believable while the blue eyes stay distinct. CAMERA: Shoot as if using an 85mm portrait lens at f/1.8, camera positioned at chest height. Use natural perspective, moderate compression, sharp focus on both eyes, and gradual falloff across the blazer. GRADE: Use a clean editorial grade with neutral skin, slightly cool shadows, restrained highlights, medium contrast, and no heavy teal-orange treatment. Preserve fine pores and subtle skin variation. OUTPUT: Create a vertical 4:5 portrait at 2048 × 2560 pixels, with the head and upper torso comfortably inside the frame. DO-NOT: no face slimming, no skin whitening, no changed eye shape, no plastic smoothing, no enlarged eyes, no changed facial structure, no invented jewellery or tattoos, and no artificial iris pattern that looks painted on.
✦ Curated by MFDA
Deep Hazel Eyes With Luxury Portrait Depth
Hazel gives you a middle ground between dramatic and believable. Brown and subtle green tones can sit together inside the iris, giving the eyes more depth without changing the person's identity. This look pairs well with warm indoor lighting, textured wool clothing and a shallow-depth portrait where the background falls softly out of focus.

The Prompt
Using the uploaded photo, create a refined luxury indoor portrait with naturally deep hazel eyes, textured wool clothing and soft background separation. KEEP — Keep the exact face structure, eye shape, natural eye colour pattern, skin tone and visible skin texture from the uploaded photo. Preserve the original hairline, facial hair if present, nose shape, lips, jawline, cheek structure and natural facial asymmetry. Keep the person's body proportions, shoulder width and apparent build unchanged. The person must remain clearly recognisable as the same individual. CHANGE — Change only the styling and photographic setting. Dress the subject in a finely textured wool garment in deep charcoal brown or muted camel, with visible woven fibres rather than a smooth synthetic finish. Change the background to an elegant warm indoor setting with restrained brown, beige and amber tones. Use a relaxed three-quarter portrait pose with the shoulders slightly turned while the face remains naturally oriented toward the camera. Replace the original lighting with controlled warm window light and add gentle ambient fill. Apply a rich, restrained colour grade with warm highlights and neutral-to-slightly cool shadows. SCENE — Place the subject indoors near a large window during late afternoon. Behind them, use softly suggested wood, plaster and neutral furnishings, but keep the environment unobtrusive. The background should fall strongly out of focus without becoming an artificial colour wash. Keep enough environmental texture to suggest a real premium interior. LIGHT — Light the face primarily from the front-left at roughly 45 degrees, using broad diffused window light. Keep the shadow side of the face gently filled so the eyes, nose and jaw remain naturally dimensional. Use approximately 3800–4500K overall warmth without turning the skin orange. CAMERA — Use an 85mm portrait lens at f/1.8, camera positioned at chest height and roughly eye-level with the subject. Keep the face sharply focused while allowing the wool texture and interior behind the subject to soften progressively with distance. GRADE — Use warm brown and amber highlights, controlled contrast, natural skin saturation and subtle shadow depth. Keep the hazel eyes detailed with visible brown and muted green variation. OUTPUT — Produce a vertical 4:5 portrait at 2048 × 2560 pixels, with the head and upper torso comfortably inside the frame. DO-NOT — No face slimming, no skin whitening, no changed eye colour, no plastic smoothing, no invented jewellery or tattoos.
✦ Curated by MFDA
How to use these in Gemini
Open Google Gemini and start a chat that supports image generation or image editing.
Upload your original portrait using the Add files option.
Add one prompt card from above after uploading the image.
Keep the requested 4:5 ratio when you're making a social portrait, or use 1:1 for a profile image.
Generate the edit and compare the eyes with your original photo before saving the result.
If the first result is wrong, ask Gemini to preserve the original face, facial proportions and skin texture while changing only the eye treatment.
Getting better results
Use a portrait taken near a window: soft side light gives Gemini clearer information around the iris than a harsh phone flash.
Crop to 4:5 before editing: a larger face gives the model more visible eye detail to work with.
Keep the original hairstyle: changing hair and eyes together makes face drift harder to spot.
Avoid beauty filters in the source photo: smoothed skin removes texture that helps the edited face stay believable.
Choose a simple background: a plain wall or softly blurred street scene keeps attention on the eyes.
Try neutral clothing first: black, navy or white clothing makes subtle iris colors easier to judge.
Check both eyes at 100% zoom: mismatched iris color or pupil size can be easy to miss in a small preview.
When the result comes out wrong
What went wrong | Why it happens | What to change |
|---|---|---|
Face looks like a different person | The edit changes facial proportions along with the eyes | Tell Gemini to preserve identity, face shape, nose, jaw and hairstyle |
Skin looks plastic | Skin enhancement gets mixed into the portrait edit | Request natural pores, original skin texture and no beauty retouching |
Hands look distorted | A wider generated composition may introduce new hands or arms | Use the original crop and ask for an eye-only edit |
Lighting looks pasted on | The new eye color doesn't match the original light direction | Tell Gemini to match the existing shadows, highlights and color temperature |
Eyes have different colors | The model interprets each iris separately | Specify identical eye color and matching iris structure |
Eyes look unnaturally bright | Saturation is pushed too far | Ask for muted, realistic iris color with natural catchlights |
FAQ
Does a men eye prompt work on any photo?
Not equally well. A clear portrait with visible eyes gives the best result. Side profiles, sunglasses, extreme low-light photos and heavily filtered selfies are harder. If one eye is hidden by hair or shadow, Gemini may invent details rather than accurately preserving the original eye.
Why does Gemini change my face when editing the eyes?
Image editors sometimes regenerate more of the portrait than you intended. This is more common when the original photo is small, blurry or heavily edited. Use a sharp source and clearly request that facial structure, skin texture, hairstyle and identity remain unchanged while the eye treatment is modified.
Can I use these edited images commercially?
That depends on the image tool's current terms, your source photo rights and how the final image is used. Don't assume that an AI-generated or AI-edited image automatically gives you unrestricted commercial rights. Check Gemini's current terms and make sure you own or have permission to use the uploaded photograph.
Is Gemini free for these eye edits?
Gemini has offered different features and usage limits depending on the account, region and plan. Image-generation availability can also change. Check the options shown in your own Gemini account before planning a large batch of edits.
How do I get a different eye variation?
Keep the same source photo and change only the visual direction. For example, move from deep brown to muted hazel, or from natural lighting to cinematic evening light. Small changes usually give more controlled variations than rewriting the entire request.
Why do my eyes look too fake?
The usual causes are excessive saturation, perfectly uniform iris color and overly bright eye whites. Ask for visible iris fibers, natural catchlights, subtle color variation and realistic shadows. A slightly imperfect eye usually looks more convincing than an extremely polished one.
Closing
Start with the deep-brown version if you want the safest result. Once Gemini keeps your face stable, try hazel or steel-blue for a stronger portrait. For social media, 4:5 gives you enough room around the head while keeping the eyes prominent. If glasses are involved, expect to make a second attempt.
About the Author
Naziya
Creative AI writer at MFDA, sharing trendy photo-editing prompts and fresh ideas for beautiful, stylish AI images.